Free and Fun Woodworking Projects for Beginners to Build for Your Home

Free and Fun Woodworking Projects for Beginners to Build for Your Home

Free and Fun Woodworking Projects for Beginners to Build for Your Home

Hey there, woodworking enthusiasts! Are you itching to unleash your inner craftsman but feeling a little intimidated by the world of saws, hammers, and sawdust? Don't worry, you're not alone. Woodworking can seem daunting at first, but with a little guidance and the right projects, you'll be building amazing things in no time.

Today, we're diving into the world of beginner-friendly woodworking projects that are both free and fun. These projects are perfect for learning the basics, getting comfortable with your tools, and adding some unique charm to your home.

Simple and Satisfying Starter Projects

Let's start with some projects that are easy to tackle and won't break the bank. These are great for building confidence and getting familiar with the basics of woodworking.

1. Wooden Coasters

Coasters are an excellent place to start! They're small, quick to build, and a practical addition to any home.

Here's what you'll need:

  • Scrap wood (1/2-inch thick is ideal)
  • Saw (hand saw, circular saw, or jigsaw)
  • Sandpaper (various grits)
  • Wood glue
  • Optional: Stain, paint, or sealant

Cut your wood into 4-inch squares, sand the edges smooth, and then glue a piece of felt or cork to the bottom to prevent scratches. Personalize them by staining, painting, or adding a decorative element like a burned design or a small piece of inlay.

2. Wooden Picture Frames

Display your favorite memories in style with custom-made picture frames. They're a fantastic way to showcase your woodworking skills while adding a touch of personalization to your home decor.

Here's what you'll need:

  • Scrap wood (1/2-inch thick is ideal)
  • Saw (hand saw, circular saw, or jigsaw)
  • Sandpaper (various grits)
  • Miter saw (optional but helpful)
  • Wood glue
  • Nails or screws
  • Optional: Stain, paint, or sealant

Measure the size of your picture, and then cut the wood to create the frame pieces. Use a miter saw to make clean 45-degree angles for a professional look. Sand the edges, glue the pieces together, and secure them with nails or screws. Let the glue dry completely before adding a finish.

3. Wooden Utensil Holder

Keep your kitchen organized and stylish with a DIY utensil holder. This project is super functional and a great way to add a personalized touch to your kitchen.

Here's what you'll need:

  • Scrap wood (1/2-inch thick is ideal)
  • Saw (hand saw, circular saw, or jigsaw)
  • Sandpaper (various grits)
  • Wood glue
  • Nails or screws
  • Optional: Stain, paint, or sealant

Cut your wood into rectangular pieces to create the sides and base of the holder. Use glue and nails or screws to assemble them. Once dry, sand the exterior smooth and add a finishing touch like a stain, paint, or sealant.

Up Your Game with Intermediate Projects

Ready to move beyond the basics? These projects are a bit more challenging but offer a fantastic opportunity to expand your woodworking skills.

1. Wooden Cutting Board

A cutting board is a kitchen essential, and making your own is a rewarding project. This project allows you to experiment with different wood types and finishes.

Here's what you'll need:

  • Hardwood boards (like maple, walnut, or cherry)
  • Saw (hand saw, circular saw, or jigsaw)
  • Sandpaper (various grits)
  • Wood glue
  • Clamps
  • Mineral oil or cutting board conditioner
  • Optional: A router for rounded edges

Cut the hardwood boards to your desired size. Glue them together, ensuring the grain runs in alternating directions for stability. Use clamps to secure the pieces while the glue dries. Sand the board smooth and apply a finishing coat of mineral oil or cutting board conditioner.

2. Wooden Birdhouse

Bring a little wildlife to your backyard with a handcrafted birdhouse. This project combines basic carpentry with creative design, allowing you to tailor it to your specific bird preferences.

Here's what you'll need:

  • Scrap wood (1/2-inch thick is ideal)
  • Saw (hand saw, circular saw, or jigsaw)
  • Sandpaper (various grits)
  • Wood glue
  • Nails or screws
  • Optional: Stain, paint, or a metal roof

Cut the wood into the required pieces for the base, sides, roof, and entrance hole. Glue and secure the pieces using nails or screws. Sand the exterior smooth, and then decorate with paint or stain. A metal roof adds a touch of durability and a unique look.

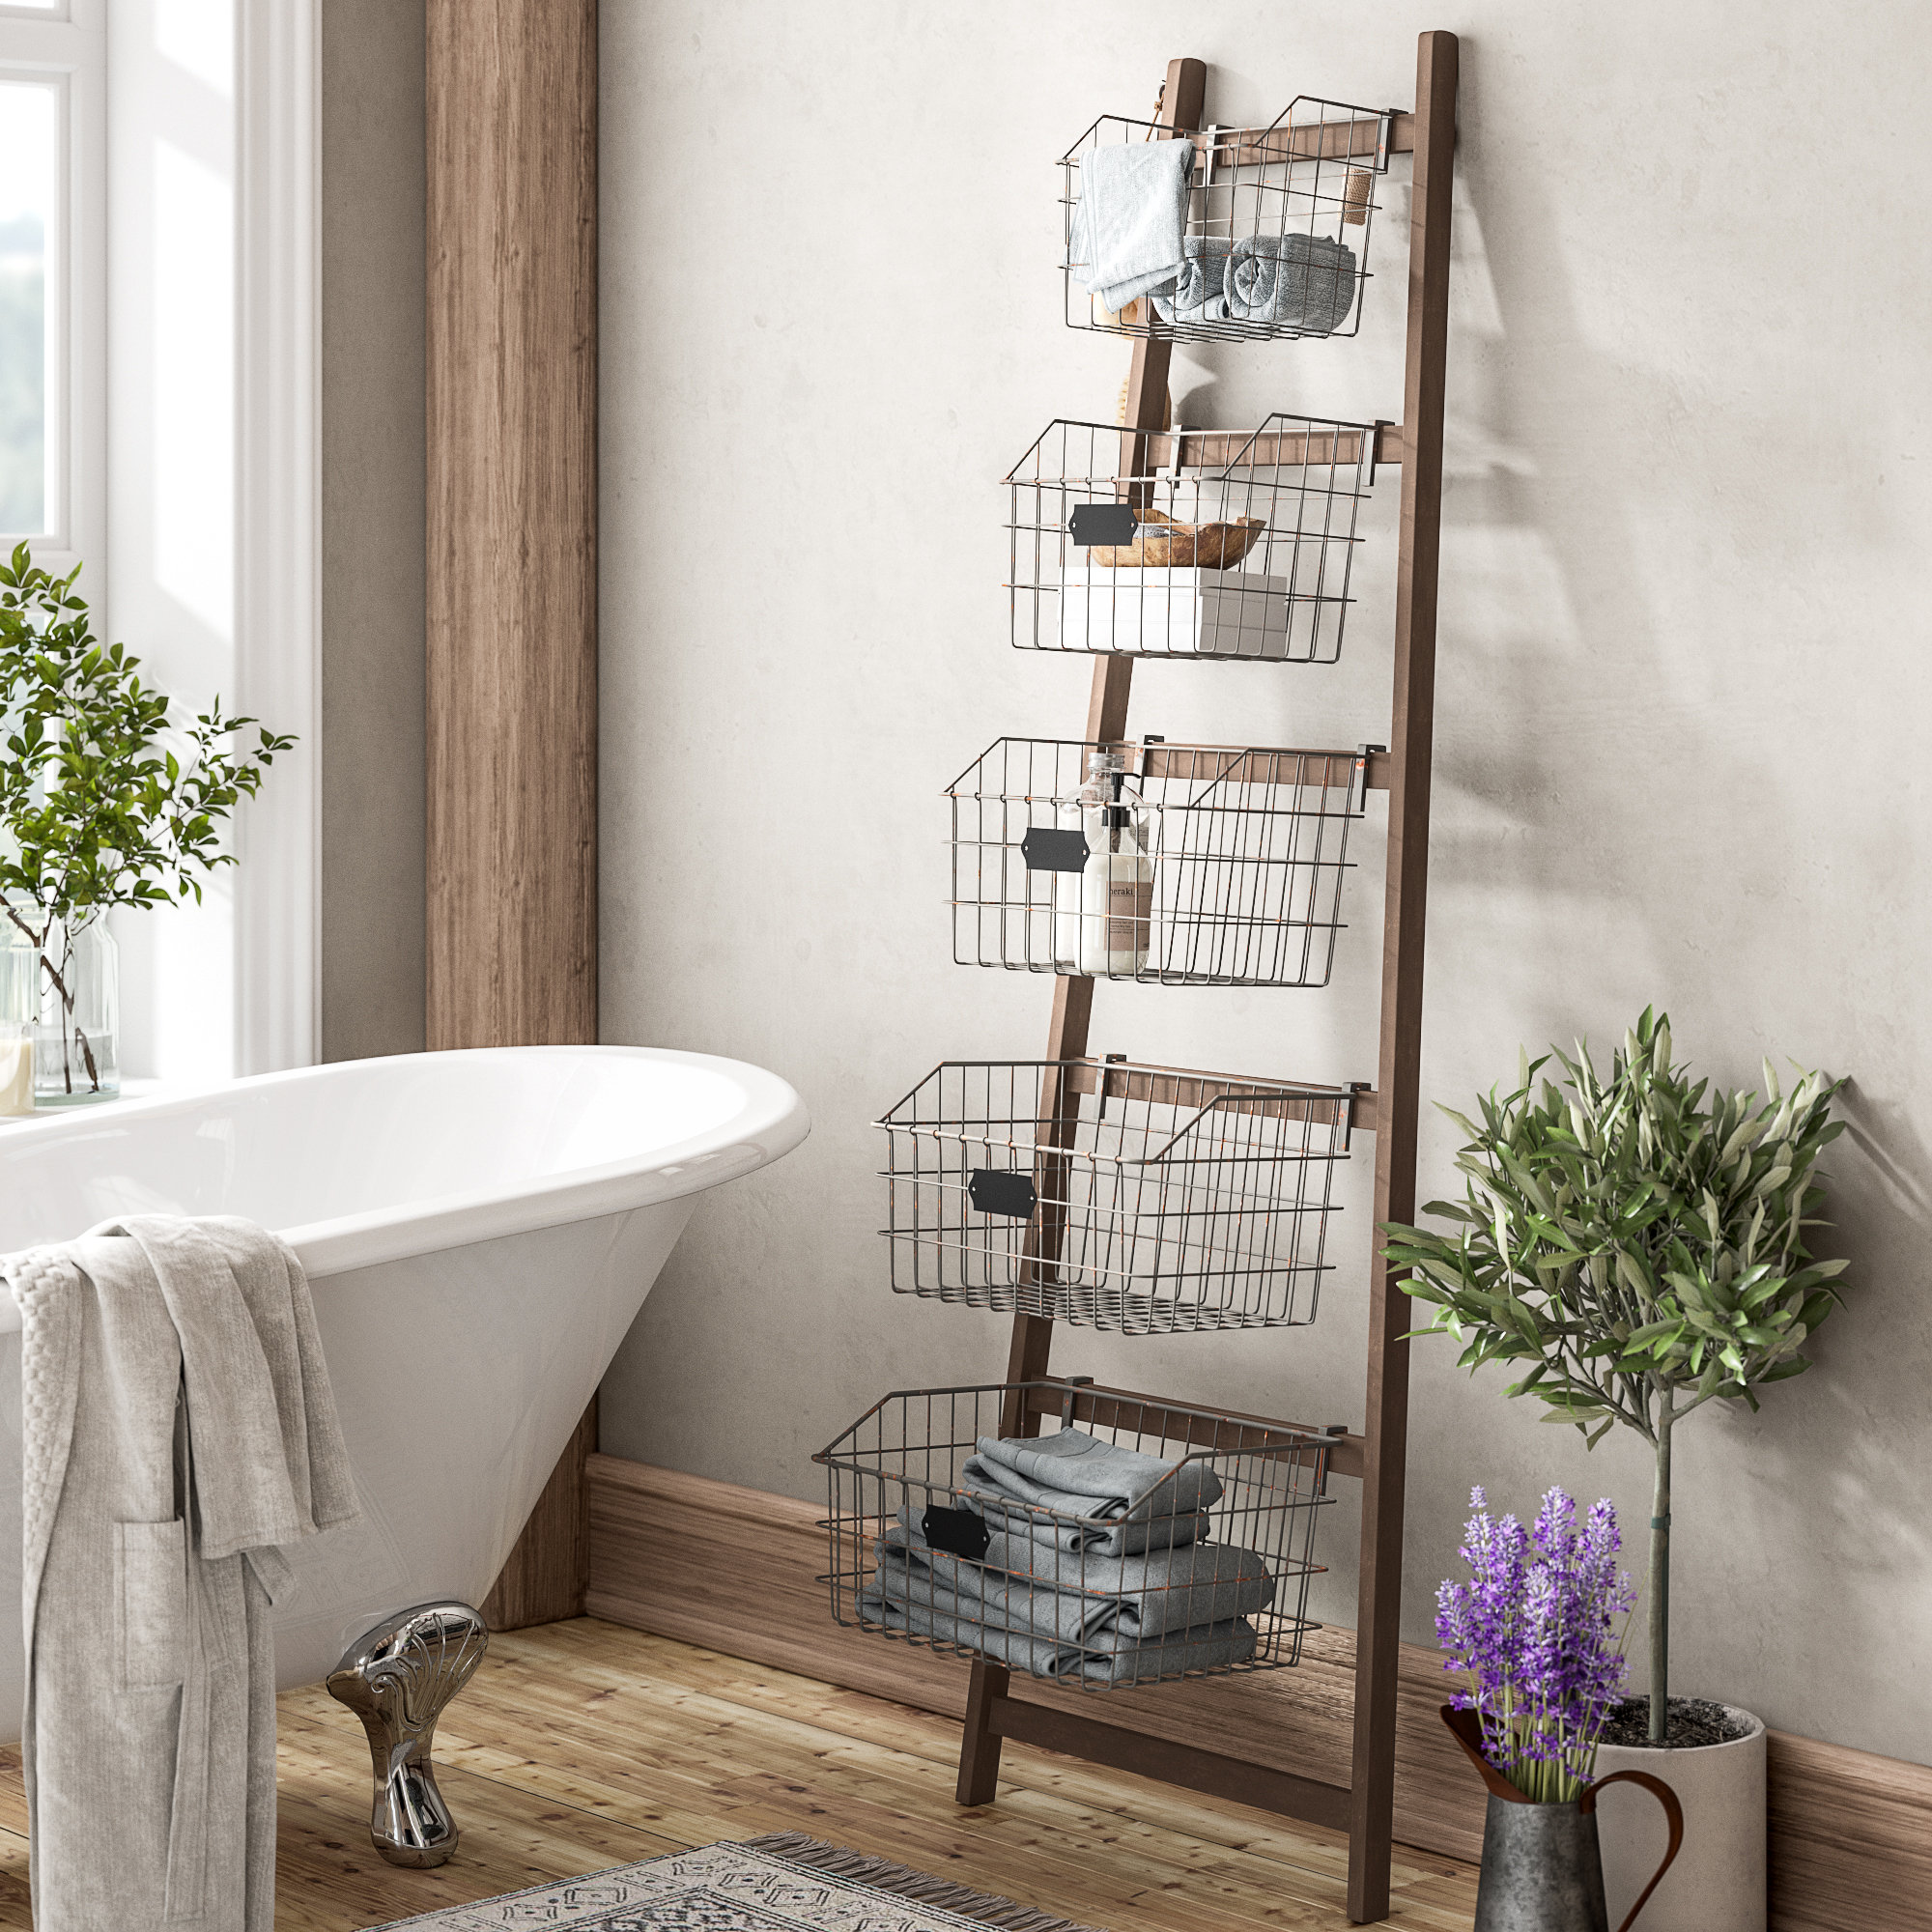
3. Wooden Wall Shelf

Add some extra storage and style to your home with a custom-made wall shelf. This project lets you experiment with different shapes, sizes, and finishes to perfectly suit your needs.

Here's what you'll need:

  • Scrap wood (1/2-inch thick is ideal)
  • Saw (hand saw, circular saw, or jigsaw)
  • Sandpaper (various grits)
  • Wood glue
  • Nails or screws
  • Brackets (for wall mounting)
  • Optional: Stain, paint, or sealant

Cut the wood into the desired shape and size for the shelf and any supports or decorative elements. Glue and secure the pieces together. Sand the surface smooth and apply a finish like stain or paint. Attach the brackets to the wall and then mount your shelf.

The Joy of Woodworking for Beginners

Woodworking isn't just about building things; it's about creating something unique and personal. Each project is a chance to experiment with different techniques, learn from your mistakes, and discover the satisfaction of bringing your own ideas to life. As you progress, you'll find yourself drawn to more challenging projects, and the possibilities become endless!

Remember, every woodworking journey begins with a single step. So, grab some scrap wood, gather your tools, and let's build something amazing together.

Commonly Asked Questions

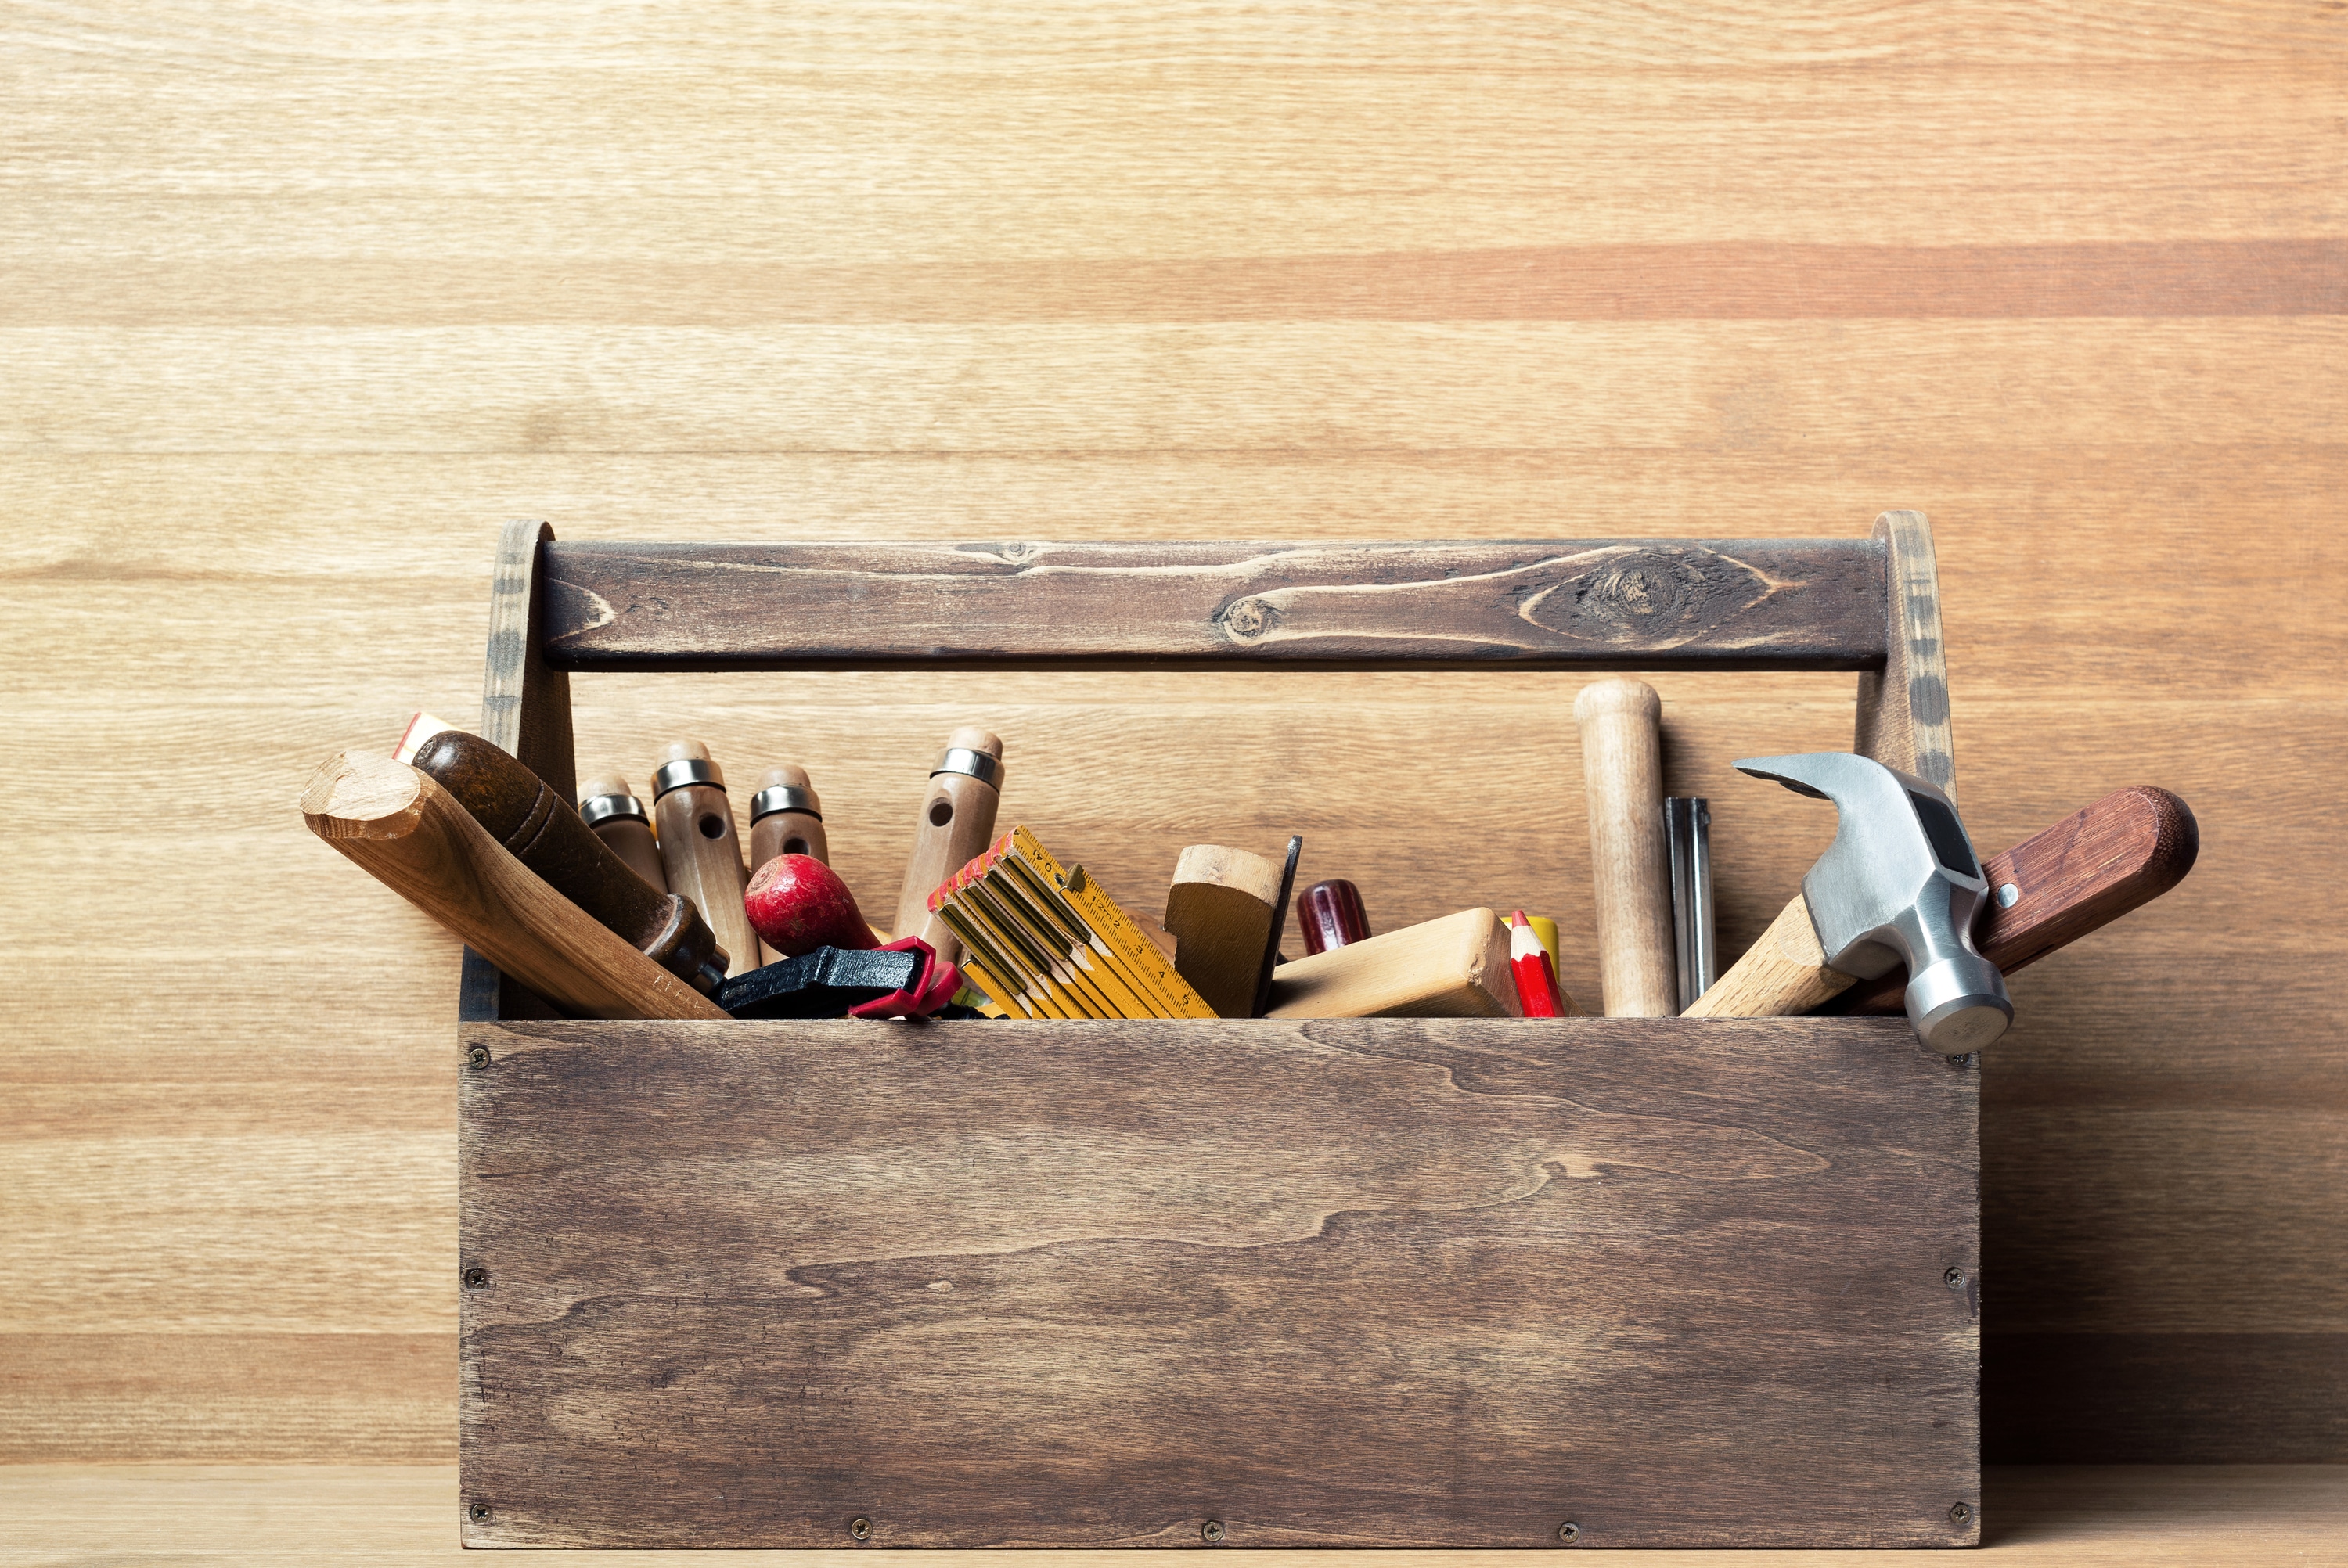
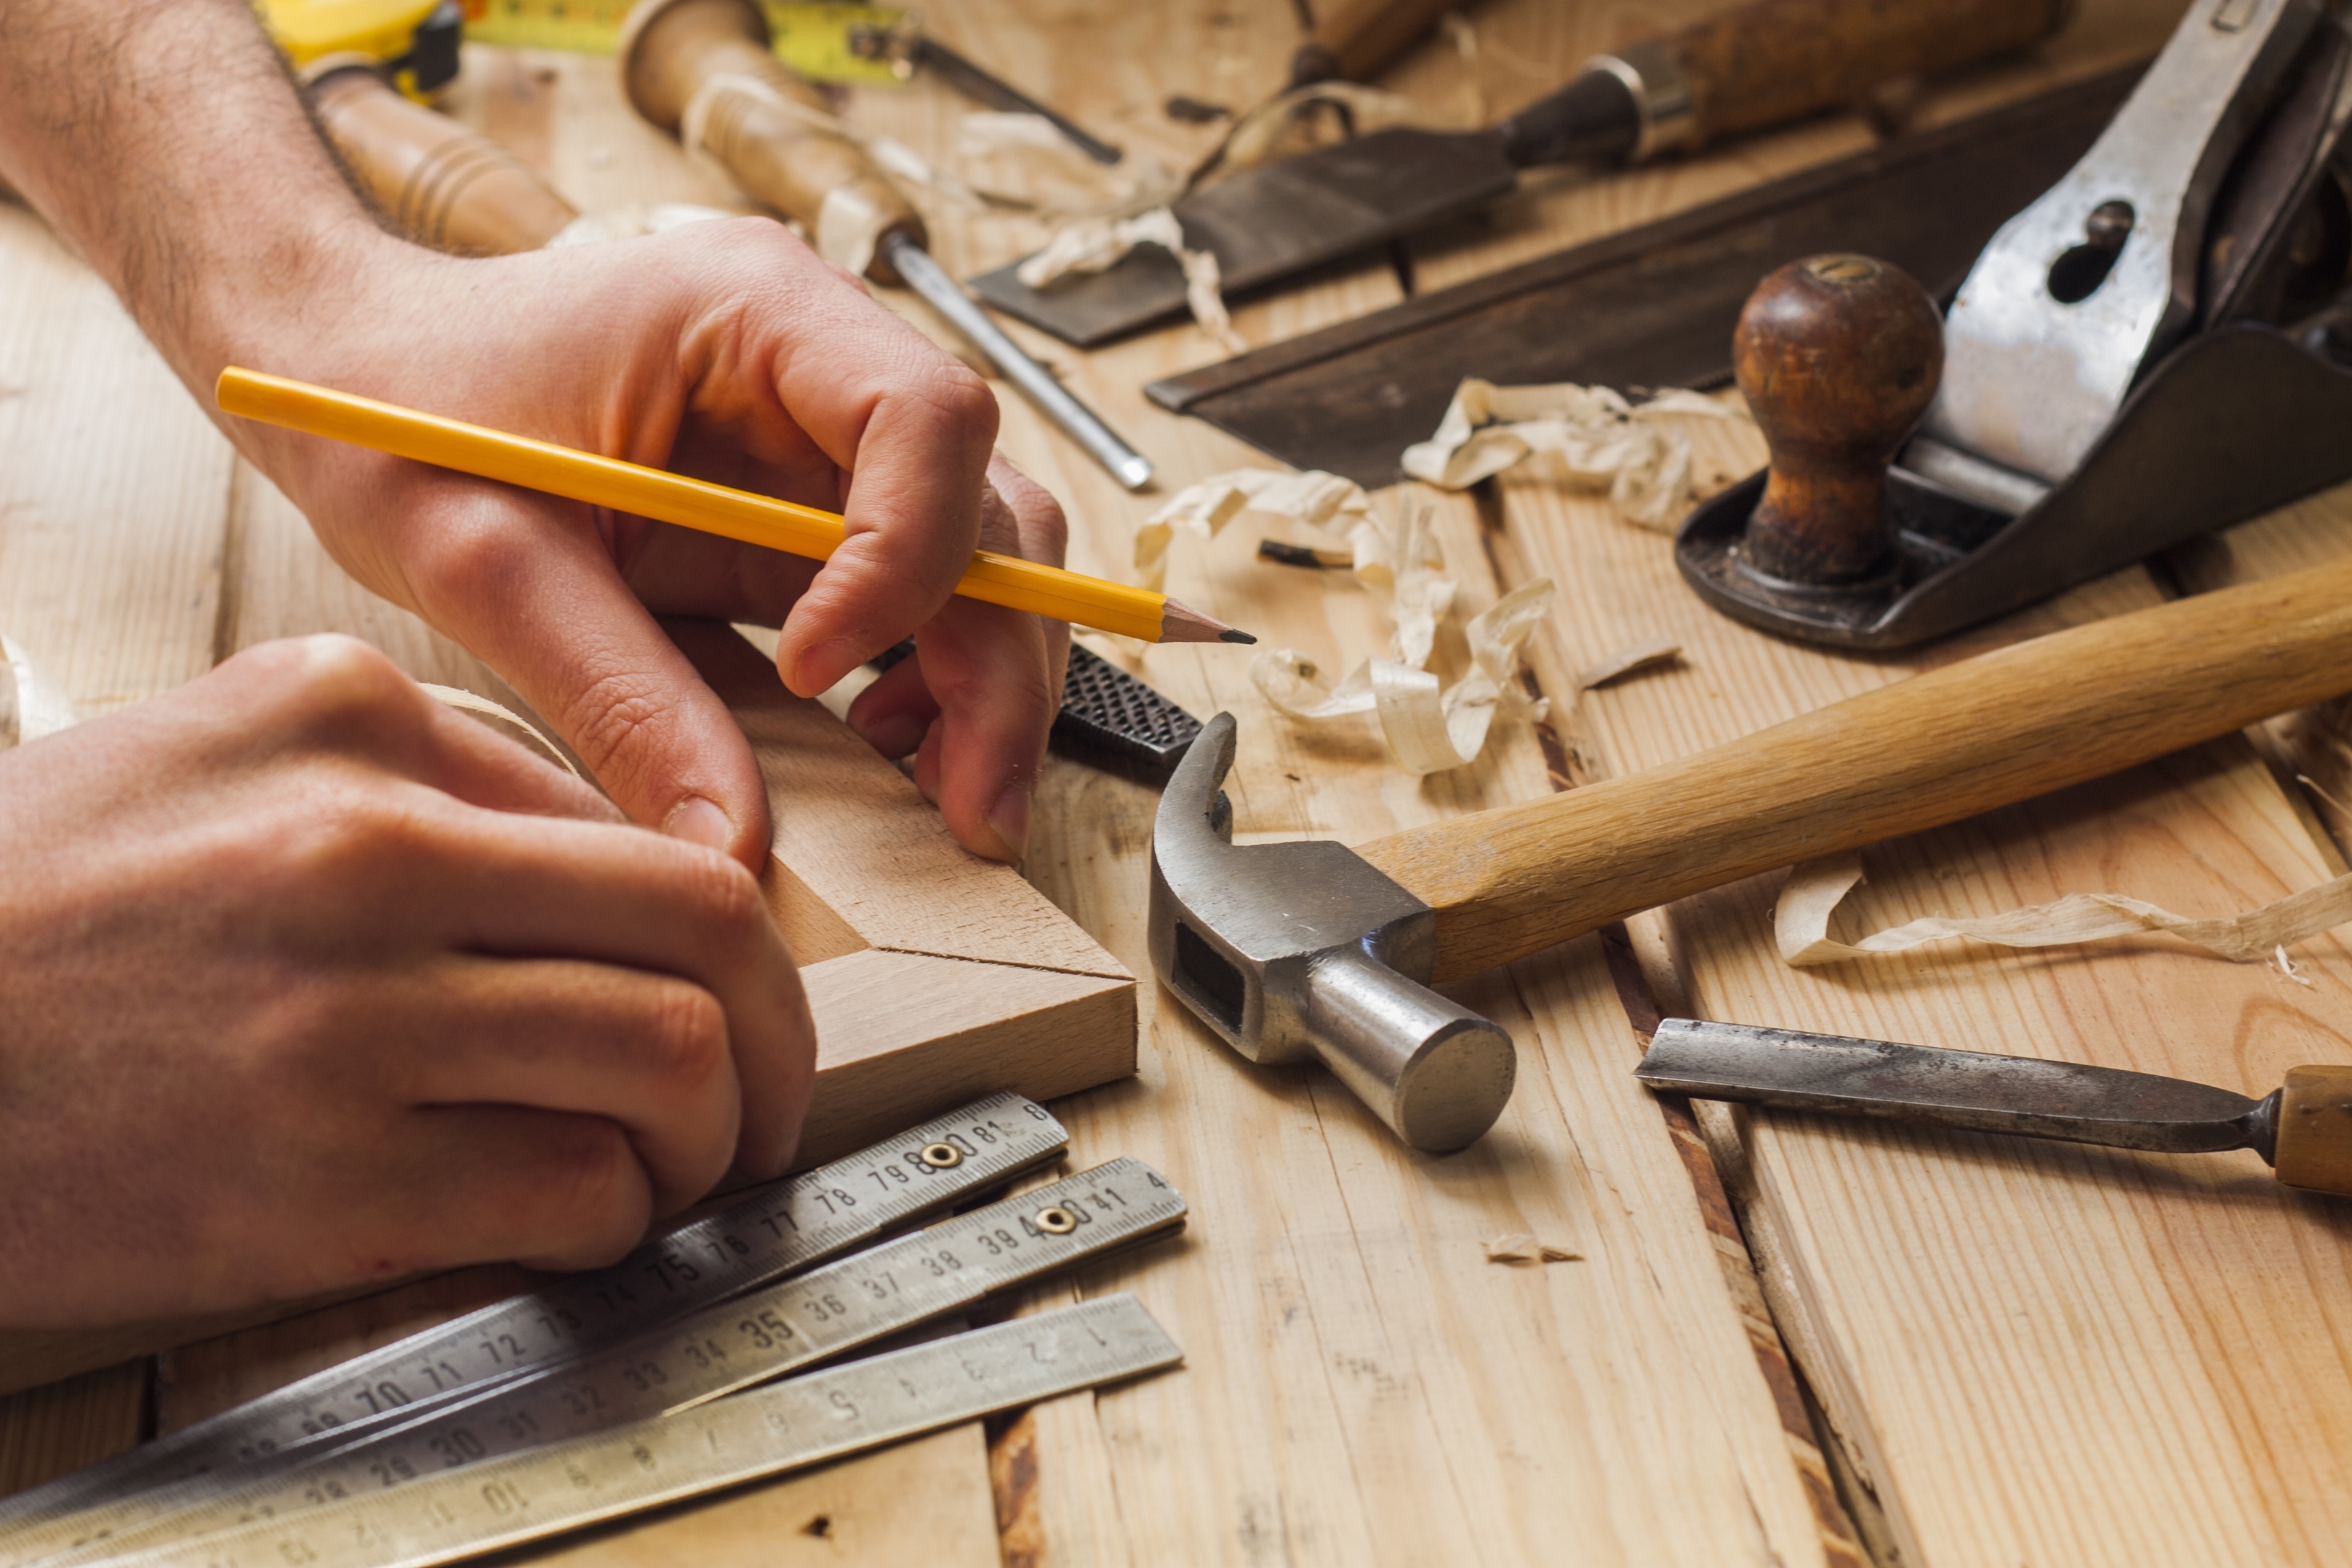
1. What are the essential tools for a beginner woodworker?

You can start with a few basics:

  • Saw (hand saw, circular saw, or jigsaw)
  • Sandpaper (various grits)
  • Screwdriver
  • Hammer
  • Measuring tape
  • Pencil
  • Wood glue
  • Clamps (optional)

As you progress, you can add more specialized tools like a miter saw, router, or drill press.

2. Where can I find free woodworking plans?

There are many online resources for free woodworking plans. Here are a few great places to start:

  • Ana White (Ana-White.com)
  • The Wood Whisperer (TheWoodWhisperer.com)
  • Instructables (Instructables.com)
  • Pinterest

3. How do I choose the right wood for my project?

Consider the project's purpose and the wood's properties:

  • Hardness: Harder woods like maple or oak are great for cutting boards and durable furniture.
  • Grain: Wood with a beautiful grain pattern can enhance the look of your project.
  • Cost: Consider your budget and whether you're using scrap wood or purchasing new boards.

Don't hesitate to ask questions at your local lumberyard. The staff is knowledgeable and happy to help you choose the right wood for your needs.

Happy building!

Share:

High-Demand Blanket Ladder Designs for Woodworkers

High-Demand Blanket Ladder Designs for Woodworkers

High-Demand Blanket Ladder Designs for Woodworkers

In the realm of woodworking, creating functional and aesthetically pleasing pieces is a sought-after skill. Blanket ladders, with their charming simplicity and practicality, have become a popular choice for woodworkers looking to showcase their craftsmanship. Beyond the basic design, the demand for unique and captivating blanket ladder designs is ever-increasing, catering to diverse aesthetics and preferences. This article explores high-demand blanket ladder designs that will inspire woodworkers to create exceptional pieces.

Classic and Timeless Designs

The classic blanket ladder design remains a timeless favorite for its clean lines and simplicity. It often features a rectangular frame with rungs evenly spaced, offering a straightforward and functional design. While seemingly basic, variations can be achieved through the choice of wood species, finish, and additional embellishments. The classic design provides a solid foundation for customization.

Modern and Minimalist Approach

Modern blanket ladder designs embrace clean lines, minimalist aesthetics, and a focus on functionality. They often feature a sleek frame made of materials like metal or wood, with strategically placed rungs to create a visually appealing yet functional design. The use of geometric shapes, such as triangles or circles, can enhance the modern feel.

Rustic and Farmhouse Appeal

Rustic blanket ladder designs evoke a sense of warmth and charm. They commonly feature reclaimed or weathered wood, rough-hewn finishes, and a rustic aesthetic. The use of distressed paint, metal accents, or repurposed materials can further enhance the rustic feel. These ladders often have a more organic and irregular design, adding character and authenticity.

Incorporating Unique Elements

Woodworkers seeking to create truly exceptional blanket ladders often incorporate unique elements to elevate the design. These elements can be functional, aesthetic, or a combination of both.

Adding Storage Solutions

Integrating storage solutions into a blanket ladder can significantly enhance its practicality. This can include shelves, baskets, or drawers attached to the frame, providing additional storage for blankets, throws, or other items. The storage solutions should complement the overall design and be seamlessly integrated into the ladder.

Decorative Touches

Decorative touches can transform a simple blanket ladder into a statement piece. Examples include adding decorative hardware, carving details into the wood, or incorporating intricate patterns. The choice of decorative elements should align with the overall design theme and enhance the visual appeal of the ladder.

Popular Customization Options

Woodworkers have a wide range of customization options to personalize their blanket ladder designs. These options cater to specific needs and preferences, ensuring that each ladder is unique.

Wood Species and Finishes

The choice of wood species significantly impacts the aesthetic and durability of the ladder. Popular options include oak, walnut, maple, and pine, each offering distinct grain patterns, colors, and properties. The finish can further enhance the wood's natural beauty and provide protection. Options include staining, painting, or applying a clear coat.

Rung Design and Spacing

The rung design and spacing can influence the ladder's functionality and visual appeal. Classic rungs are typically rectangular, while variations include rounded, tapered, or even decorative rungs. The spacing should be suitable for the size of blankets and throws, while also maintaining a visually appealing balance.

Frame Variations

The frame design can be customized to create unique shapes and sizes. Variations include curved frames, angled frames, or even asymmetrical designs. The frame design should be compatible with the overall style and functionality of the ladder.

Marketing and Selling Blanket Ladder Designs

Woodworkers can successfully market and sell their blanket ladder designs through various channels. Effective strategies include:

  • Online Marketplaces: Platforms like Etsy, Amazon Handmade, and Shopify offer a convenient and global reach for selling handcrafted items.
  • Local Craft Fairs and Shows: Participating in local craft fairs and shows provides an opportunity to showcase work and interact directly with customers.
  • Social Media Marketing: Utilize platforms like Instagram, Facebook, and Pinterest to showcase designs, engage with potential customers, and build a brand presence.
  • Website and Portfolio: Create a website or online portfolio to showcase designs, provide information about the craft, and offer a platform for sales.

Conclusion

Creating high-demand blanket ladder designs is an art form that combines functionality with aesthetics. By embracing classic designs, incorporating unique elements, and offering a range of customization options, woodworkers can capture the hearts of buyers seeking both practicality and style. Through strategic marketing and a passion for craftsmanship, woodworkers can turn their blanket ladder designs into a successful and fulfilling business venture.

Share:

How to Build Modular Wooden Storage Bins for Versatile Use

How to Build Modular Wooden Storage Bins for Versatile Use

Build Versatile Modular Wooden Storage Bins

Looking for a way to organize your belongings and add a touch of rustic charm to your home? Building modular wooden storage bins is a fantastic project that allows you to create customized storage solutions for any room. These bins are incredibly versatile and can be adapted to fit your specific needs. Follow this detailed guide and transform your storage woes into a stylish and functional haven.

Planning and Design

Before you pick up your saw, take some time to plan out your project. Consider the size, shape, and number of bins you need. Think about where you'll be using them. Will they be stacked, placed on shelves, or used as standalone units?

Size and Shape

Determine the dimensions of your bins. Consider the items you'll be storing. For smaller items like toys or craft supplies, smaller bins are ideal. Larger items like blankets or clothing may require larger bins. The shape of the bin can be square, rectangular, or even a more interesting design like a hexagon. Don't be afraid to experiment!

Material

Select your wood type. For durability and a classic look, go with hardwoods like oak or maple. Pine is a more affordable option and readily available. If you want to create a more rustic aesthetic, consider using reclaimed wood. Make sure to pick a wood type that's suitable for the intended use and matches your design vision.

Hardware

Choose your hardware. This includes hinges, latches, handles, and any decorative elements. Think about the functionality and style you desire. You might opt for simple, industrial-style hardware or decorative, vintage-inspired pieces.

Building the Bins

Now it's time to put your plan into action. Here's a step-by-step guide to building your modular wooden storage bins:

Cutting the Wood

Using a saw, cut your wood to the desired dimensions. Remember to factor in the thickness of the wood when calculating the overall size of the bin. For example, if you're building a bin with a 12" x 12" base, and your wood is 1" thick, you'll need to cut the base pieces to 10" x 10" to ensure a 12" x 12" finished product. Measure twice, cut once! Precision is key to achieving a well-built bin.

Assembling the Bin

Use wood glue and screws to construct the box. If you're using a dado joint, ensure the joints are tight and even. If you're using a rabbet joint, make sure the edges align perfectly. After gluing and screwing the pieces together, use clamps to hold the pieces together until the glue dries completely.

Adding Hardware

Once the bin is assembled, attach your hardware. Attach hinges for lids or doors, handles for easy opening and closing, and latches to secure the bins. Make sure the hardware is securely fastened and aligned correctly.

Finishing Touches

Sand your bins to a smooth finish. You can choose to leave the wood natural or stain it to match your decor. You can also paint the bins for a more colorful look. Add any decorative touches like stencils or wood burning if desired.

Modular Design

What makes these bins modular is their ability to connect and be used in different ways. There are a few ways to achieve this:

Interlocking Design

You can create a system of interlocking sides or bases. This allows the bins to connect seamlessly and be stacked or arranged in various configurations.

Connectors

Use simple connectors, such as metal brackets or wooden dowels, to attach the bins together. This offers a more flexible way to customize your storage layout.

Stacking

The most basic form of modularity is stacking. Design your bins with sturdy bases and lids that can hold the weight of other bins on top.

Versatile Uses

Modular wooden storage bins can be used in any room of your home, offering a stylish and functional solution for a wide range of items. Some possibilities include:

  • Organizing toys in the playroom.
  • Storing clothes and linens in the bedroom.
  • Creating a neat and tidy workspace in your office.
  • Holding craft supplies or gardening tools in your workshop.
  • Adding storage to your kitchen or bathroom.

Tips and Tricks

  • Use pre-cut wood or plywood for easier assembly.
  • Invest in quality tools for accurate cuts and assembly.
  • Consider adding a lining to your bins for a more polished look.
  • Be creative with the design and add personal touches to make your bins unique.
  • Have fun with the process and enjoy the satisfaction of creating something useful and beautiful.

Building modular wooden storage bins is a project that blends practicality with creativity. Not only will you have organized spaces, but you'll also have unique, handmade pieces that add warmth and character to your home. Get started today and enjoy the benefits of versatile, customizable storage solutions.

Share:

Profitable Wooden Bench Projects to Make and Sell

Profitable Wooden Bench Projects to Make and Sell

Profitable Wooden Bench Projects to Make and Sell

Hey there, woodworking enthusiasts! Looking for a profitable project to try your hand at? Well, let me tell you, building and selling wooden benches is a fantastic idea. It's a timeless classic, always in demand, and offers a ton of creative possibilities.

The best part? You don't need to be a master craftsman to get started. With a little know-how and some basic woodworking skills, you can build some seriously beautiful and functional benches that people will love.

So, let's dive into the world of profitable wooden bench projects. I'm going to give you some top-notch ideas, tips for success, and even address some common questions you might have. Ready? Let's get started!

Popular and Profitable Bench Styles

The beauty of building benches is the wide variety of styles you can create. Each style caters to different tastes and needs, meaning you can find your niche and target specific customers.

Classic Garden Benches

These are the tried-and-true, timeless designs. Think simple, elegant, and built for relaxation in outdoor spaces. You can play around with the back style (straight, curved, slatted, etc.), use different wood types, and even add decorative elements like scrollwork or carvings.

Rustic Farmhouse Benches

Oh, how we love the farmhouse aesthetic! These benches are all about rustic charm. Think reclaimed wood, chunky legs, and a cozy, welcoming feel. They pair beautifully with farmhouse tables and create a warm ambiance in any space. Don't be afraid to embrace imperfections รข€" they're part of the charm.

Modern Minimalist Benches

For those who appreciate clean lines and sleek design, minimalist benches are a hot commodity. They feature simple forms, often with metal accents, and a focus on functionality. Think straight lines, geometric shapes, and a clean, uncluttered look.

Storage Benches

Who doesn't love extra storage? Storage benches are perfect for entryways, bedrooms, or even kitchens. They offer a practical seating option while cleverly concealing items beneath the seat. Get creative with compartment sizes and add features like lift-up lids or pull-out drawers.

Custom Benches

This is where your creativity really shines! Offer custom benches tailored to individual needs and preferences. Think personalized carvings, engraved initials, or even specific dimensions to fit a particular space. This allows you to command higher prices and really wow your customers.

Tips for Success in Building and Selling Wooden Benches

You've got the ideas, now let's talk about how to make your bench business a success. Here are some key pointers:

1. Master the Basics

Before you start crafting benches like a pro, make sure you have a solid foundation in woodworking basics. This means learning how to cut, join, sand, and finish wood. There are countless online resources, books, and even woodworking classes available to help you on your journey.

2. Choose the Right Wood

Wood selection is crucial for both functionality and aesthetics. Consider factors like durability, cost, and appearance. Hardwoods like oak, maple, and walnut are known for their strength and longevity, while softer woods like pine and cedar offer a more affordable option.

3. Focus on Quality

Don't compromise on quality รข€" it's essential for building a reputation and attracting repeat customers. Use sturdy joints, smooth finishes, and ensure your benches are built to last. Remember, a well-crafted bench is an investment piece that people will cherish for years.

4. Get Creative with Design

Don't be afraid to experiment and add your personal touch. Think about incorporating different wood species, unique finishes, and interesting details like carvings, inlays, or metal accents. Let your creativity flow, and you'll be amazed at what you can create.

5. Promote Your Work

Once you have some fantastic benches ready to go, it's time to get them in front of your target audience. Consider setting up an online shop, participating in craft fairs and markets, or even partnering with local furniture stores. Don't forget to utilize social media to showcase your work and build a following.

6. Price Your Benches Right

This is crucial! Do your research and consider your costs for materials, labor, and overhead. Set competitive prices that reflect the quality and uniqueness of your benches. Remember, it's better to price yourself a little high and be perceived as a premium brand than to undercut yourself and compromise your profits.

Commonly Asked Questions about Selling Wooden Benches

Now, let's address some frequently asked questions:

How do I find customers?

There are multiple ways to find customers:

  • Online Marketplaces: Etsy, Facebook Marketplace, and other online platforms are great for reaching a wider audience.
  • Craft Fairs and Markets: These events are fantastic for connecting with potential customers face-to-face.
  • Local Furniture Stores: Partnering with local retailers can give you access to a larger customer base.
  • Social Media: Instagram, Pinterest, and Facebook are powerful tools for showcasing your work and attracting followers.

What kind of permits do I need?

Depending on your location and business structure, you may need various permits and licenses, such as a business license, a home occupation permit, or a sales tax permit. Research the specific requirements in your area.

How much can I make selling wooden benches?

Earning potential varies widely depending on factors like the type of bench, pricing, and sales volume. However, with careful planning and marketing, you can definitely earn a decent income from selling wooden benches. Remember, the more unique and high-quality your benches are, the higher the potential profit.

Is it profitable to sell wooden benches?

Absolutely! Wooden benches are a sought-after item with consistent demand. The key is to offer quality products, create a strong brand, and effectively market your work. With dedication and effort, you can turn your woodworking passion into a profitable business.

So, there you have it รข€" a comprehensive guide to making and selling profitable wooden benches. Remember, it's all about combining your woodworking skills with your creative flair. Go out there, get your hands dirty, and build something amazing!

Share:

Woodworking Side Projects for Extra Income and Fun

Woodworking Side Projects for Extra Income and Fun

Woodworking Side Projects for Extra Income and Fun

Are you looking for a way to turn your passion for woodworking into a profitable side hustle? Or maybe you just want to create beautiful and useful items for your home and family? Woodworking offers a fantastic opportunity to do both, allowing you to express your creativity while earning some extra cash. With a little effort and the right projects, you can transform your woodworking skills into a source of both income and satisfaction.

Finding the Right Projects

The key to success in any side hustle is choosing projects that are both enjoyable and in demand. When it comes to woodworking, there are countless possibilities, but certain types of projects consistently prove popular with buyers. Think about what skills you enjoy using and what products are in high demand. This can be determined by exploring online marketplaces like Etsy or Facebook Marketplace to see what's selling well.

Consider These Popular Woodworking Projects:

  • Custom cutting boards: These are practical, beautiful, and always in demand. You can get creative with different wood types, designs, and even add personalized touches.
  • Rustic furniture: Think coffee tables, end tables, benches, and shelves. This style is timeless and appeals to a wide range of buyers.
  • Decorative signs: From welcome signs to inspirational quotes, thereรข€™s a market for unique and charming wooden signs.
  • Wooden toys: Handmade toys, especially those made from natural wood, are popular with parents looking for safe and eco-friendly options for their children.
  • Personalized gifts: Engraved cutting boards, custom picture frames, and personalized jewelry boxes are always appreciated as thoughtful gifts.

Marketing Your Woodworking Creations

Once youรข€™ve created some stunning woodworking pieces, itรข€™s time to get them in front of potential customers. There are several effective ways to market your creations, both online and offline:

  • Online Marketplaces: Etsy, Facebook Marketplace, and eBay are excellent platforms to showcase and sell your woodworking creations. You can create professional listings with high-quality photos and detailed descriptions.
  • Social Media: Instagram, Pinterest, and Facebook are powerful tools for building an online presence and reaching a wider audience. Share beautiful photos of your work, behind-the-scenes glimpses, and engage with potential customers.
  • Local Craft Fairs and Markets: Attending local craft fairs and markets allows you to connect with customers in person, demonstrate your skills, and sell your pieces directly.
  • Word-of-Mouth: Donรข€™t underestimate the power of word-of-mouth marketing. Tell your friends, family, and colleagues about your woodworking business. They can help spread the word and generate referrals.

Boosting Your Woodworking Skills

The world of woodworking is constantly evolving, so itรข€™s important to stay up-to-date with the latest techniques and trends. There are many resources available to help you enhance your woodworking skills:

  • Online Tutorials and Courses: Websites like YouTube, Skillshare, and Udemy offer a wealth of free and paid woodworking tutorials and courses. You can learn new techniques, improve your existing skills, and discover new ideas.
  • Woodworking Books and Magazines: Browse your local bookstore or library for woodworking books and magazines filled with project plans, tips, and inspiration.
  • Woodworking Classes: Enroll in woodworking classes at your local community college or woodworking school. These classes provide hands-on experience and personalized instruction.
  • Woodworking Communities: Join online woodworking communities and forums to connect with other woodworkers, share your projects, and learn from their experiences.

Turning Your Passion into Profit

Woodworking is a fulfilling and rewarding hobby that can also provide a source of extra income. By choosing popular projects, marketing your creations effectively, and continuously expanding your skills, you can turn your passion into a profitable side hustle. So, grab your tools, unleash your creativity, and start creating beautiful and functional woodworking pieces today!

Share:

Step-by-Step Coffee Table Build Guide with Plans PDF

Step-by-Step Coffee Table Build Guide with Plans PDF

Build Your Own Coffee Table: A Step-by-Step Guide with Plans

Hey there, DIY enthusiasts! Are you looking to add a touch of personality and charm to your living room? Building your own coffee table is a fantastic way to do just that. Not only will you save money, but you'll also have the satisfaction of crafting a piece that perfectly suits your style and space.

In this guide, I'll walk you through the entire process, from choosing the right materials to finishing touches. We'll be working with plans that are easy to follow, even for beginners. Let's get started!

Materials You'll Need

First things first, gather your materials. You'll need:

  • Wood: I recommend using 2x4s for the frame and plywood for the top. If you want a more rustic look, you could use reclaimed wood or rough-cut lumber.
  • Wood glue: This helps create a strong bond between the wood pieces.
  • Wood screws: Choose screws that are long enough to securely fasten the wood pieces together.
  • Sandpaper: You'll need different grits (rough to fine) for smoothing out the wood.
  • Wood stain or paint: This is for giving your table its final color and finish.
  • Polyurethane or varnish: This creates a protective layer on the wood.
  • Measuring tape: Essential for accurate cuts.
  • Circular saw or table saw: For making precise cuts in the wood.
  • Drill: For drilling pilot holes before screwing in the screws.
  • Clamps: For holding the wood pieces in place while gluing and screwing.
  • Safety goggles and gloves: These are important for protecting your eyes and hands.

Downloading and Understanding the Plans

Now, let's get those plans! You can find a wide range of free coffee table plans online. Here are a few tips for choosing the right ones:

  • Consider your skill level: Look for plans that match your carpentry experience. If you're a beginner, start with a simple design.
  • Think about your space: Measure your living room and choose plans that will fit comfortably.
  • Choose a style you love: There are countless designs out there, from modern to rustic. Pick something that complements your dรƒ©cor.

Once you've downloaded the plans, take some time to study them. Understand the dimensions, materials, and assembly instructions. If anything is unclear, don't hesitate to look for explanations online or ask for help from a more experienced woodworker.

Cutting the Wood

Time to get your hands dirty! Put on your safety gear and get ready to cut. Using your saw, carefully cut the wood according to the dimensions outlined in the plans. Take your time and double-check your measurements to ensure everything fits together perfectly.

A few tips for cutting wood:

  • Use a cutting guide: This will help you make straight cuts and prevent mistakes.
  • Cut with the grain: This will prevent the wood from splintering.
  • Practice on scrap wood first: This is a good way to get comfortable with your saw and cutting technique.

Assembling the Frame

You've got the pieces, now let's put them together! Here's how to assemble the frame of your coffee table:

  • Apply wood glue: Use a generous amount of glue to the ends of the wood pieces where they will be joined.
  • Clamp the pieces together: Make sure the pieces are lined up correctly and clamp them tightly.
  • Pre-drill pilot holes: This will help prevent the wood from splitting when you screw it together.
  • Screw the pieces together: Use your drill to screw the pieces together.
  • Repeat for the rest of the frame: Follow the same steps to assemble the rest of the frame.

Adding the Top

Now for the finishing touch! The top of your coffee table will be made of plywood. Here's how to attach it to the frame:

  • Cut the plywood to size: Measure the top of the frame and cut the plywood accordingly.
  • Place the plywood on top of the frame: Make sure it's centered.
  • Attach the plywood to the frame: Use wood screws to secure the plywood to the frame.

Sanding, Staining, and Finishing

You're almost there! Now it's time to give your coffee table a smooth and polished look:

  • Sand the entire table: Start with a rough grit sandpaper to remove any rough edges. Then, gradually move to finer grits to achieve a smooth finish.
  • Apply stain or paint: Choose a color that you love and apply it evenly to the entire table. If you're using stain, make sure to follow the manufacturer's instructions.
  • Apply polyurethane or varnish: This will protect the wood and give it a beautiful sheen. Apply several thin coats, allowing each coat to dry completely before applying the next.

That's It! Your Coffee Table is Ready

Congratulations, you've built your very own coffee table! Sit back, admire your handiwork, and enjoy the fruits of your labor. This unique piece will be the envy of your guests, and you can proudly say "I made that!"

Remember, this is just a basic guide. There are countless variations and customizations you can make to personalize your coffee table. So, get creative, explore different designs, and have fun with the process. Happy building!

Share:

DIY Firewood Rack Plans Using Pallets for the Perfect Rustic Look

DIY Firewood Rack Plans Using Pallets for the Perfect Rustic Look

DIY Firewood Rack Plans Using Pallets for the Perfect Rustic Look

Embrace the charm of rustic living with a DIY firewood rack crafted from repurposed pallets. This practical and aesthetically pleasing project allows you to create a functional storage solution while adding a touch of natural beauty to your outdoor space. With a few simple tools and materials, you can transform discarded pallets into a sturdy and stylish firewood rack that complements your rustic dรƒ©cor.

Materials

To embark on this DIY project, gather the following materials:

  • One or two sturdy pallets (ensure they are free of any chemical treatments or pesticides)
  • Wood screws (2 1/2 inches or longer)
  • Wood glue
  • Measuring tape
  • Level
  • Circular saw or hand saw
  • Drill with Phillips head bit
  • Safety goggles and gloves
  • Optional: Stain or paint (for finishing)

Step-by-Step Guide

Step 1: Prepare the Pallet

Begin by carefully dismantling the pallet. Use a pry bar or hammer to loosen the nails holding the boards together. Remove any loose or damaged boards. You can use a circular saw or handsaw to cut the boards to your desired length. Remember to wear safety goggles and gloves during this process.

Step 2: Design the Rack

Determine the dimensions of your desired firewood rack. Consider the size of your firewood logs and the available space in your backyard or patio. You can create a simple single-tier rack or a more complex multi-tiered design, depending on your preference and storage needs.

Step 3: Assemble the Base

For the base of the rack, select two sturdy pallet boards of equal length. Position them parallel to each other, leaving a gap between them that is slightly wider than the diameter of your firewood logs. Secure the boards together using wood screws, ensuring that the screws are long enough to penetrate both boards.

Step 4: Create the Sides

Cut two additional pallet boards to the desired height of your rack. These will form the sides of the rack. Position them perpendicular to the base boards, aligning the ends with the outer edges of the base. Attach the side boards to the base using wood screws, ensuring that the screws are long enough to penetrate both boards.

Step 5: Construct the Back

For a sturdier rack, attach a back panel. Cut a pallet board to the width of the rack and attach it to the back of the sides using wood screws.

Step 6: Add Shelves (Optional)

If you are creating a multi-tiered rack, cut additional pallet boards to the desired length for the shelves. Attach them to the sides of the rack using wood screws, ensuring that they are spaced evenly.

Step 7: Secure the Rack

Once the structure is complete, reinforce it by adding additional screws at strategic points. Ensure that the screws are long enough to penetrate all layers of wood.

Step 8: Finishing Touches (Optional)

To enhance the look of your firewood rack, you can stain or paint it. Use a wood stain or paint that complements your existing outdoor dรƒ©cor. Allow the finish to dry completely before using the rack.

Tips for a Successful DIY Firewood Rack

  • Use high-quality wood screws: Choose screws that are long enough to penetrate all layers of wood for added strength and stability.
  • Pre-drill pilot holes: Before driving screws into the wood, pre-drill pilot holes slightly smaller than the diameter of the screws. This will help prevent splitting of the wood.
  • Check for stability: Before using the rack, test its stability by gently rocking it back and forth. Ensure that it is firmly secured and does not wobble.
  • Consider location: Choose a location for your firewood rack that is dry and sheltered from the elements. Direct sunlight and moisture can damage the wood over time.

Safety Precautions

While working with pallets and tools, prioritize safety. Wear safety goggles and gloves to protect your eyes and hands from debris. Ensure that the area is well-lit and clear of obstacles.

Conclusion

With a bit of creativity and effort, you can create a rustic and functional firewood rack from repurposed pallets. This DIY project allows you to add a touch of natural beauty to your outdoor space while enjoying the warmth and ambiance of a crackling fire. Embrace the rustic charm of pallet wood and create a unique and practical storage solution that complements your outdoor living area.

Share:

Quick and Simple Pallet Firewood Rack Construction for Beginners

Quick and Simple Pallet Firewood Rack Construction for Beginners

Quick and Simple Pallet Firewood Rack Construction for Beginners

Firewood racks are an essential component of any home with a fireplace or wood-burning stove. They provide a convenient and organized way to store firewood, keeping it dry and readily accessible for use. For those looking for a cost-effective and eco-friendly solution, repurposing pallets offers an excellent option. This comprehensive guide will walk you through the steps of constructing a simple yet sturdy pallet firewood rack, suitable for beginners with minimal woodworking experience.

Materials and Tools

Before embarking on the construction process, ensure you have the necessary materials and tools. This will streamline the process and prevent any delays.

Materials:

  • One or two standard pallets (depending on desired size)
  • Wood screws (2.5 inches or longer)
  • Optional: Wood stain or paint (for aesthetic enhancement)
  • Optional: Heavy-duty casters (for mobility)

Tools:

  • Circular saw or jigsaw (for cutting pallet planks)
  • Drill/Driver with appropriate drill bits
  • Tape measure
  • Level
  • Safety glasses
  • Work gloves

Preparing the Pallet

The first step involves preparing the pallet for construction. This includes removing any unwanted components and ensuring the wood is clean and sound.

1. Inspect and Clean:

Carefully inspect the pallet for any signs of damage, rot, or loose boards. Remove any loose nails or staples. Clean the pallet thoroughly using a wire brush or sandpaper to remove dirt, debris, and any remaining staples.

2. Disassemble (If Necessary):

If the pallet has additional bracing or components that are not needed for the rack, carefully disassemble them using a hammer and pry bar. Be mindful of the direction of the nails and use caution to avoid injuries.

Constructing the Firewood Rack

With the prepared pallet, you can start building the rack. The following steps outline the basic construction process, which can be customized based on your preferences and space constraints.

1. Determine Dimensions:

Decide on the desired dimensions of your rack. This will depend on the size of the pallet and the amount of firewood you wish to store. Measure the width and length of the pallet and mark the desired cut points using a pencil or marker.

2. Cut the Pallet:

Using a circular saw or jigsaw, carefully cut the pallet planks according to the marked dimensions. Ensure the cuts are clean and straight to maintain the integrity of the rack. Be sure to wear safety glasses and work gloves during this step.

3. Assembly (Basic Design):

For a basic design, you can simply use the remaining intact pallet frame as the base of the rack. If you are using multiple pallets, create a stable base by joining them together with wood screws. This will form a rectangular structure. Ensure the base is sturdy and level before proceeding to the next step.

4. Adding Shelves (Optional):

To create additional storage space, you can add shelves to the rack. Cut additional pallet planks to the desired shelf length and width. Attach the shelves to the base using wood screws, ensuring they are securely fastened and evenly spaced.

5. Finishing Touches:

Once the basic structure is complete, you can personalize the rack with finishing touches. Apply a wood stain or paint to enhance the aesthetic appeal and protect the wood. If desired, you can also attach casters to the base for easy mobility. Sanding the rack before applying any finishes will give a smoother and more professional appearance.

Safety Precautions

Safety should always be a priority when working with tools and wood. Here are some essential precautions to keep in mind:

  • Wear safety glasses to protect your eyes from flying debris.
  • Use work gloves to protect your hands from splinters and sharp edges.
  • Work in a well-ventilated area.
  • Keep children and pets away from the work area.
  • Use caution when operating power tools and follow the manufacturer's instructions.
  • Ensure the pallet is stable before adding firewood to avoid potential accidents.

Variations and Customization

The basic design outlined above can be customized to suit your specific needs and preferences. Here are a few ideas for variations and customization:

  • Stacked Pallet Design: Stack two or more pallets vertically to create a taller rack with increased storage capacity.
  • Wall-Mounted Design: Attach the pallet rack to a wall for space-saving purposes. This is particularly suitable for smaller areas.
  • Rustic Aesthetic: Embrace the natural look of the pallet wood by leaving it unstained and unpainted. This creates a rustic and charming aesthetic.
  • Decorative Elements: Add decorative elements such as metal hooks, rope, or wire to enhance the rack's appearance and functionality.
  • Custom Sizes: Tailor the dimensions of the rack to fit the specific space you intend to use it in.

Conclusion

Constructing a pallet firewood rack is a rewarding project that combines affordability, sustainability, and practicality. By following these steps, you can create a functional and aesthetically pleasing storage solution for your firewood. Remember to prioritize safety, exercise creativity, and personalize the rack to fit your individual needs and preferences. With a little effort and imagination, you can transform a discarded pallet into a valuable asset for your home.

Share:

Building a Wooden Compost Bin: Step-by-Step Instructions

Building a Wooden Compost Bin: Step-by-Step Instructions

Building a Wooden Compost Bin: A Step-by-Step Guide

Composting is a wonderful way to reduce waste and create nutrient-rich soil for your garden. A homemade wooden compost bin offers a stylish and sustainable solution for turning kitchen scraps and yard waste into valuable compost. This guide will walk you through the steps to build your own compost bin, ensuring a successful composting journey.

Materials You'll Need

Before you begin, gather the following materials:

  • Wood: Choose durable, rot-resistant wood like cedar, redwood, or pressure-treated lumber. You'll need enough to create a bin with three sides, a bottom, and a lid.
  • Screws: Use screws that are long enough to penetrate both pieces of wood and secure the bin securely.
  • Measuring Tape: For accurate measurements of your bin dimensions.
  • Level: Ensure your bin is level for proper drainage and stability.
  • Saw: A circular saw or jigsaw will come in handy for cutting the wood.
  • Drill: Used to pre-drill holes for screws to prevent splitting the wood.
  • Safety Glasses: Protect your eyes from flying debris while cutting and drilling.
  • Gloves: Protect your hands when working with wood.

Step-by-Step Construction

Step 1: Designing Your Bin

Decide on the size and shape of your compost bin. A square or rectangular bin is easy to build. Consider the amount of compost you'll need, the available space, and your personal preferences. A 3x3x3 foot bin provides a good starting point.

Step 2: Cutting the Wood

Use your saw to cut the wood to the desired dimensions. Measure carefully and make sure all cuts are accurate. You'll need two long sides, one short side, a bottom panel, and four pieces for the lid.

Step 3: Assembling the Base

Lay out the two long sides and the short side on a flat surface to create a rectangle. Pre-drill pilot holes in the wood to prevent splitting. Use screws to attach the three sides.

Step 4: Attaching the Bottom

Place the bottom panel inside the rectangle, flush with the bottom edges. Secure it to the sides with screws.

Step 5: Building the Lid

Assemble the lid using four pieces of wood. Use screws to create a frame. A hinge attached to one side will allow you to open and close the lid easily.

Step 6: Finishing Touches

Sand down any rough edges on your bin to prevent splinters. You can choose to stain or paint your bin to protect it from weather damage and add a personal touch.

Starting Your Compost

Once your bin is complete, you can begin composting! Start with a layer of brown material, such as leaves, twigs, or shredded paper. Next, add a layer of green material, like kitchen scraps, grass clippings, or coffee grounds. Repeat the layers and ensure adequate airflow between layers. Turn your compost every few weeks to allow for proper aeration.

With a little effort and some patience, you'll have rich, nutrient-dense compost in a few months. Enjoy the satisfaction of turning waste into something useful and watching your garden flourish. Happy composting!

Share:

How to Build a Traditional Birdhouse with a Wood Siding Finish

How to Build a Traditional Birdhouse with a Wood Siding Finish

Building a Traditional Birdhouse with a Wood Siding Finish

Hey there, bird lovers! Ready to build a beautiful birdhouse that'll attract feathered friends to your backyard? We're going to create a classic, traditional birdhouse with a charming wood siding finish. It's a project that's fun, rewarding, and will add a touch of rustic elegance to your garden.

Don't worry if you're a beginner, we'll break it down step by step. You'll learn the basics of woodworking, and by the end, you'll have a birdhouse that you can be proud of. Let's get started!

Gathering Your Supplies

Before we start hammering and sawing, let's gather our tools and materials. Here's what you'll need:

  • Wood:
    • 1 piece of 1/2" plywood, 12" x 12" (for the base and roof)
    • 4 pieces of 1/2" plywood, 6" x 12" (for the sides)
    • 1 piece of 1/4" plywood, 6" x 6" (for the back)
    • 1 piece of 1/4" plywood, 3" x 6" (for the entrance)
    • 1 piece of 1/4" plywood, 2" x 4" (for the perch)
  • Hardware:
    • Wood screws, 1-1/2" and 1" long
    • Exterior wood glue
  • Tools:
    • Measuring tape
    • Pencil
    • Saw (circular saw or hand saw)
    • Drill with a drill bit slightly smaller than your screws
    • Screwdriver
    • Clamps
    • Sandpaper (various grits)
    • Paintbrush
    • Exterior wood stain (optional)

Constructing the Birdhouse

Now, let's get our hands dirty and build the birdhouse! Follow these steps:

Cutting the Wood

First, we need to cut our wood to size. You'll need the following pieces:

  • Base and Roof: Cut the 12" x 12" plywood into two squares, each measuring 6" x 6".
  • Sides: Cut the four 6" x 12" plywood pieces into four rectangles, each measuring 6" x 6".
  • Back: Keep the 6" x 6" piece of 1/4" plywood as is.
  • Entrance: Cut the 3" x 6" plywood into a rectangle measuring 2" x 3".
  • Perch: Cut the 2" x 4" plywood into a rectangle measuring 1" x 2".

Remember to be careful when using a saw. Always wear safety glasses and use a sawhorse or workbench for support.

Assembling the Walls

Now, let's build the birdhouse's walls. This is where the fun really begins!

  1. Attaching the Sides: Place the 6" x 6" base piece on a flat surface. Using wood glue and 1-1/2" screws, attach the four 6" x 6" side pieces to the base, one piece for each side. Make sure the edges are flush and the sides are square.
  2. Securing the Back: Place the 6" x 6" back piece against the open end of the birdhouse, aligning it with the edges of the sides. Use wood glue and screws to attach it to the birdhouse.

Creating the Entrance

Time to give our feathered friends a way to get inside!

  1. Cutting the Entrance Hole: Mark a 2" x 3" rectangle on one of the side pieces, roughly 3" from the top of the birdhouse. You can use a compass to draw a rounded entrance if you prefer.
  2. Attaching the Entrance Piece: Using a drill and screws, attach the 2" x 3" entrance piece to the birdhouse, covering the opening you just created.

Adding the Roof and Perch

Almost there! We're just a few steps away from completing our birdhouse. Let's add the roof and perch.

  1. Attaching the Roof: Place the 6" x 6" roof piece on top of the birdhouse, aligning it with the sides. Use wood glue and screws to attach it to the birdhouse.
  2. Adding the Perch: Mark a spot on the front of the birdhouse, slightly below the entrance, where you want the perch. Using wood glue and screws, attach the 1" x 2" perch to the birdhouse.

Finishing Touches

Now it's time to give our birdhouse a beautiful finish! Here's how to make it look its best:

  1. Sanding: Use sandpaper (starting with a coarse grit and working your way up to a fine grit) to smooth out any rough edges and surfaces.
  2. Staining (Optional): If you want to add a touch of color and protection, apply a water-based exterior wood stain to the birdhouse. Let it dry completely before moving on.
  3. Painting: Choose a paint that's specifically designed for outdoor use and apply it to the birdhouse with a brush. Let it dry thoroughly before hanging.

Hanging Your Birdhouse

Finally, it's time to hang your beautiful birdhouse! Here are some tips:

  1. Choose the Right Location: Hang your birdhouse in a sheltered spot, protected from strong winds and direct sunlight. Consider placing it near trees or shrubs for extra protection.
  2. The Height: Hang the birdhouse 5-8 feet off the ground. This keeps it out of reach of predators and makes it easier for birds to see and access.
  3. Secure Hanging: Use strong screws or hooks to securely attach the birdhouse to your chosen location.

Congratulations! You've successfully built a beautiful and welcoming birdhouse that will hopefully attract birds to your backyard. As you watch the birds come and go, you'll be filled with a sense of pride and accomplishment. Remember, you can always get creative and add your own personal touches to your birdhouse!

Happy building and birdwatching!

Share:

Simple Plans for Crafting a Squirrel Den Box

Simple Plans for Crafting a Squirrel Den Box

Crafting a Squirrel Den Box: A Detailed Guide

Providing shelter for wildlife can be a rewarding experience, and squirrels are no exception. A squirrel den box, also known as a squirrel nesting box, offers a safe and secure haven for these energetic creatures. Constructing a den box is a relatively simple project that can be enjoyed by individuals of all skill levels. This comprehensive guide will walk you through the process of crafting a squirrel den box, from selecting materials to installation.

Materials and Tools

Before you begin, gather the necessary materials and tools. You'll need:

Materials

  • Wood: Choose a durable, rot-resistant wood, such as cedar, redwood, or pressure-treated pine. Avoid using plywood, as it may not hold up well in the elements. A thickness of at least 1 inch is recommended.
  • Screws: Use galvanized or stainless steel screws to prevent rusting. 1 1/2-inch screws will work well for most applications.
  • Roofing felt or shingles: This will provide waterproofing for the roof.
  • Paint or stain (optional): You can apply a sealant or paint to help protect the wood from moisture and weathering. Consider using a natural color to blend in with the surrounding environment.

Tools

  • Circular saw or hand saw: For cutting the wood.
  • Drill: For drilling pilot holes for screws.
  • Screwdriver: For attaching the wood pieces.
  • Measuring tape: For accurate measurements.
  • Level: To ensure the box is level.
  • Hammer: For securing the roofing felt or shingles.

Building the Squirrel Den Box

Once you have gathered the necessary materials and tools, you can begin constructing the den box:

Cutting the Wood

  • Cut four pieces of wood for the sides of the box. The dimensions will depend on the size of the box you want to build. A standard squirrel den box is typically around 12 inches wide, 12 inches deep, and 18 inches tall. However, you can adjust these dimensions to suit your preferences.
  • Cut two pieces of wood for the top and bottom of the box. The dimensions should match the width and depth of the sides.
  • Cut one piece of wood for the front of the box. This piece should be slightly smaller than the width of the sides to allow for a small entrance hole. For a standard den box, the entrance hole should be approximately 3-4 inches in diameter.

Assembling the Box

  • Using screws, attach the sides of the box to the bottom piece of wood, creating a rectangular frame. Make sure the screws are driven in at an angle to provide extra strength.
  • Attach the front piece of wood to the sides of the box, leaving a gap for the entrance hole. Use screws to secure the front to the sides.
  • Cut the entrance hole in the front of the box. You can use a circular saw, jigsaw, or even a drill bit with a large diameter for this step.
  • Attach the top piece of wood to the sides of the box, creating a lid. Make sure the lid is securely attached. You can use hinges to allow the lid to open for cleaning or inspection.

Adding a Roof

  • Cut two pieces of wood for the roof supports. These pieces should be long enough to extend beyond the sides of the box and create an overhang for added protection from the elements.
  • Attach the roof supports to the top of the box using screws. Make sure they are positioned evenly and level.
  • Cut a piece of roofing felt or shingles to fit the roof of the den box. Secure it to the roof using nails or staples.

Finishing Touches

  • If desired, you can paint or stain the den box to help protect the wood and blend it in with the surrounding environment. Choose a non-toxic paint or stain that is safe for wildlife.
  • Drill a few small drainage holes in the bottom of the box to allow water to escape. This will help prevent moisture buildup inside the box.

Installing the Squirrel Den Box

Once the den box is constructed, it's time to install it in a suitable location. Choose a spot that is:

  • High off the ground: To prevent predators from easily accessing the box. A minimum height of 10 feet is recommended.
  • Protected from the elements: The den box should be positioned in a location that offers some protection from rain and wind. If possible, place it under a tree or overhang.
  • Near a food source: Squirrels will be more likely to use the den box if it's near a source of food, such as trees with nuts or a bird feeder.
  • Away from human activity: Give the squirrels some privacy and avoid placing the den box in a high-traffic area.

To install the den box:

  • Mount the box securely: Use screws or bolts to attach the den box to a sturdy tree, post, or pole. Make sure the box is mounted level.
  • Provide a clear path: Ensure that there is a clear path leading to the entrance hole of the den box so that squirrels can easily access it.
  • Leave the box alone: Once the den box is installed, leave it alone and avoid disturbing it. This will help the squirrels to feel safe and comfortable in their new home.

Maintaining the Squirrel Den Box

To ensure the den box remains in good condition and provides a safe habitat for squirrels, it's important to perform routine maintenance:

  • Clean the box annually: In the late fall or early winter, after the squirrels have moved out for the season, clean out the den box to remove any debris, nests, or droppings. This will help prevent disease and infestation.
  • Inspect the box for damage: Check the box for signs of damage, such as cracks, holes, or loose screws. Repair any damage promptly to prevent it from worsening.
  • Replace the roofing felt or shingles as needed: Over time, roofing felt and shingles can become damaged. Replace them if they are worn or leaking.

Safety Precautions

While building and installing a squirrel den box is a rewarding experience, safety should always be a priority:

  • Use proper safety equipment: Wear safety glasses, gloves, and hearing protection when using power tools.
  • Be mindful of heights: If you are installing the den box at a high elevation, take extra precautions to avoid falls. Use a sturdy ladder or scaffolding, and ensure the mounting surface is secure.
  • Avoid disturbing squirrels: Once the den box is installed, avoid disturbing the squirrels that are using it. Let them settle in and establish a territory.

Crafting a squirrel den box is an enriching endeavor that can provide a haven for these delightful creatures while offering a chance to connect with nature. By following these detailed instructions and adhering to safety precautions, you can create a lasting home for squirrels in your backyard, contributing to their well-being and enjoying their lively presence.

Share:

Building a desk from scratch: step-by-step woodworking guide

Building a desk from scratch: step-by-step woodworking guide

Build Your Own Desk: A Step-by-Step Guide to Woodworking Mastery

Crafting a desk from scratch isn't just about creating a piece of furniture; it's a journey of woodworking mastery. From selecting the perfect wood to the final sanding, each step reveals the beauty and satisfaction of working with your hands. This detailed guide will walk you through the process, empowering you to build a desk that reflects your unique style and functional needs.

Step 1: Design and Planning

Before you grab your saw, take the time to visualize your ideal desk. Consider its purpose, size, and desired style. Sketch your design on paper, noting dimensions and features. This step is crucial for ensuring a successful build.

1.1 Determining Dimensions

Measure your workspace and consider the desk's intended use. A drafting desk might require a larger surface than a computer desk. Decide on the length, width, and height that best suits your needs.

1.2 Choosing the Right Wood

Wood selection plays a major role in your desk's appearance and durability. Consider the following factors:

  • Hardwood vs. Softwood: Hardwoods like oak and maple are durable and resistant to scratches, while softwoods like pine are easier to work with but less resilient.
  • Grain and Color: Wood's grain patterns and color variations add character to your desk. Choose a species that complements your style.
  • Budget: Hardwood prices vary, so consider your budget when making your selection.
  • 1.3 Planning Your Design

    Decide on the desk's overall design. Will it feature drawers, shelves, or a simple top? Consider your storage needs and any aesthetic preferences.

    Step 2: Gathering Tools and Materials

    Armed with your design, it's time to gather the necessary tools and materials. Ensure you have everything ready before you begin building. This will make the process smoother and more efficient.

    2.1 Essential Tools

    • Measuring Tape: For accurate dimensions
    • Saw: Choose a circular saw or table saw for cutting large pieces and a handsaw for smaller cuts.
    • Drill: For pilot holes and attaching hardware.
    • Screwdriver: For securing screws and assembling components.
    • Clamps: To hold pieces securely during assembly.
    • Sandpaper: Various grits for smoothing surfaces.
    • Wood Glue: For strong joints.
    • Safety Gear: Eye protection, ear protection, and dust mask.

    2.2 Required Materials

    • Wood: Cut to your desired dimensions
    • Wood Screws: For securing joints
    • Wood Glue: For strong bonds
    • Finishing Products: Stain, paint, or varnish (optional)
    • Hardware: Drawer slides, hinges, knobs, or handles (if applicable)

    Step 3: Cutting the Wood

    With your tools and materials ready, it's time to cut the wood according to your design. Take your time, ensuring accurate cuts and avoiding mistakes. This step sets the foundation for a solid and visually appealing desk.

    3.1 Cutting the Top

    Measure and mark the wood for your desk top, then use your saw to cut the piece precisely. Double-check your measurements to ensure the top fits your design.

    3.2 Cutting the Legs and Rails

    Measure and cut the legs and rails (if applicable) to the correct lengths. Remember to account for the thickness of the top when determining leg height.

    3.3 Cutting Other Components

    If your design includes drawers or shelves, cut those pieces to size as well. Be sure to reference your design plans for accurate dimensions.

    Step 4: Assembling the Desk

    Now comes the exciting part รข€" putting your desk together! Follow your design plans and take your time to create strong, secure joints.

    4.1 Joining the Legs and Rails

    Secure the legs to the top using wood screws and glue. If your design includes rails, attach those as well. Clamp the joints firmly to ensure a secure bond while the glue dries.

    4.2 Adding Drawers or Shelves

    If your design includes drawers, assemble the drawer boxes and attach them to the desk using drawer slides. Attach shelves by creating dado joints or using shelf pins.

    Step 5: Finishing Touches

    With the desk assembled, it's time to add those finishing touches that bring your creation to life. Sanding, staining, painting, and adding hardware will transform your desk into a cherished piece.

    5.1 Sanding

    Sand all surfaces with increasing grits of sandpaper to smooth out any imperfections and prepare the wood for finishing. Start with coarse grit and progress to finer grits for a smooth finish.

    5.2 Staining, Painting, or Varnishing

    Decide on your desired finish. Staining adds color and emphasizes the wood's grain pattern, while painting provides a uniform color. Varnishing protects the wood and enhances its natural beauty. Apply the chosen finish according to the manufacturer's instructions.

    5.3 Attaching Hardware

    If your desk includes drawers or doors, install hinges, knobs, and handles. Make sure these are securely attached for durability and ease of use.

    Step 6: Enjoy Your Masterpiece

    Congratulations! You've built a beautiful and functional desk from scratch. Take pride in your accomplishment and enjoy the satisfaction of creating something unique with your own hands. Your desk will be a testament to your woodworking skills and a cherished piece of furniture for years to come.

    Share:

    How to Build a Compost Bin from Scratch

    How to Build a Compost Bin from Scratch

    Building a Compost Bin from Scratch: A Step-by-Step Guide

    Hey there, fellow green thumbs! So, you're ready to embrace the world of composting, but maybe you're thinking, "Building a compost bin from scratch? Seems a bit daunting." Don't worry, it's actually easier than you might think. I'm here to walk you through it, step by step, with some tips and tricks along the way. We'll turn those kitchen scraps and yard waste into nutrient-rich compost gold in no time.

    Choosing the Right Bin

    First things first, we need to decide on the type of compost bin that suits your needs and space. There are a few popular options:

    1. Three-Bin System

    This is a classic, and for good reason! You have three bins (often made of wood or plastic): one for fresh scraps, one for actively composting, and one for finished compost. This system keeps things organized and allows you to easily rotate bins, ensuring even decomposition.

    2. Single-Bin Composter

    A single-bin composter is great for smaller spaces. They're often made of plastic or recycled materials and are easy to assemble. While they may require more turning than a three-bin system, they're still a solid option.

    3. Tumbling Composter

    If you're looking for a more hands-off approach, a tumbling composter is your friend. It's a rotating drum that allows you to turn the compost effortlessly. These are usually made of plastic and are great for smaller volumes of compost.

    4. DIY Compost Bin

    Ready to get creative? You can build your own compost bin using pallets, old barrels, or even wire mesh. This gives you full control over the size and shape of your bin, and it's a great way to repurpose materials. We'll be focusing on a DIY option in this guide, using readily available materials.

    DIY Compost Bin: Let's Get Building!

    For this DIY compost bin, we'll be using untreated wood (cedar or redwood are great choices) to create a simple, three-sided structure. Let's gather our supplies:

    Materials You'll Need:

  • Four 4x4 lumber posts (for the corners)
  • Six 2x6 lumber boards (for the sides)
  • Screws (appropriate size for your wood)
  • Level
  • Tape measure
  • Drill
  • Saw (circular saw or handsaw)
  • Safety glasses
  • Gloves
  • Optional: Chicken wire or hardware cloth (for extra ventilation and pest control)

    Step-by-Step Guide:

    1. Mark and Cut the Boards:

    Decide on the size of your compost bin (we'll go with a 3x3 foot bin for this example). Measure and mark your lumber boards for the sides. You'll need:

  • Three 3-foot long boards for the sides
  • Three 3-foot long boards for the top
  • Two 2.5-foot long boards for the back

    Use your saw to carefully cut the boards according to your measurements.

    2. Assemble the Base:

    Place two 4x4 posts on the ground, about 3 feet apart. These will be the corner posts for the base. Lay the two 3-foot boards between the posts to form the front and back sides of the base. Use screws to secure the boards to the posts.

    3. Build the Sides:

    Attach the third 3-foot board to the remaining two posts, creating a complete square base. Place another 4x4 post at each corner of the base, and screw them in place.

    4. Attach the Back:

    Screw the two 2.5-foot boards vertically onto the back posts, creating the back of the bin. Make sure the boards are level before securing them.

    5. Construct the Top:

    Attach the three 3-foot boards to the top posts, forming the lid of the bin. You can use hinges to make the lid openable for easier access to the compost.

    6. Optional: Add Ventilation:

    For optimal airflow, cut pieces of chicken wire or hardware cloth to fit the sides and back of the bin. Secure the wire with staples or wire ties. This helps prevent pests while allowing good ventilation for decomposition.

    7. Place Your Bin:

    Choose a shady spot for your compost bin, as direct sunlight can dry out the compost. Ideally, it should be close to your kitchen and garden for easy access.

    Composting Tips and Tricks:

    Now that your bin is ready, let's talk about the fun part: composting! Here's how to get the best results:

    1. The "Brown to Green" Ratio:

    For balanced composting, you need a good mix of "browns" (carbon-rich materials) and "greens" (nitrogen-rich materials). Aim for a ratio of about 2:1 (browns to greens). Here's a breakdown:

    Browns:

  • Dry leaves
  • Shredded paper
  • Straw
  • Wood shavings
  • Sawdust
  • Cardboard
  • Coffee grounds

    Greens:

  • Fruit and vegetable scraps
  • Grass clippings
  • Tea bags
  • Eggshells
  • Hair and fur

    2. Layer Up:

    Don't just dump everything in! Alternate layers of browns and greens for better airflow and decomposition. You can create layers 6-8 inches thick.

    3. Keep It Moist:

    Compost needs moisture to thrive. Aim for a damp, but not soggy, consistency. You can add water periodically to keep things moist, but avoid overwatering.

    4. Turn It Regularly:

    Every week or so, give your compost a good turn. This mixes the materials and helps to distribute oxygen for optimal decomposition.

    5. Be Patient:

    Composting takes time. Depending on the materials and your climate, it can take anywhere from 2-6 months for your compost to be ready. Just be patient, and soon you'll have nutrient-rich compost to enrich your garden!

    Enjoy Your Compost!

    Congratulations! You've successfully built your own compost bin and are well on your way to creating a sustainable and eco-friendly garden. Keep experimenting with different materials, and soon you'll become a composting pro. Remember, your garden will thank you for it! Happy composting!

  • Share:

    Simple diy magic box: woodworking with basic tools

    Simple diy magic box: woodworking with basic tools

    Simple DIY Magic Box: Woodworking with Basic Tools

    Hey there, fellow crafters! Ever wanted to build something cool and magical with just a few basic tools? Well, you're in luck! Today we're diving into the world of DIY magic boxes. Think of it as a miniature stage for all your tricks and illusions, ready to wow your friends and family.

    Don't worry, this project isn't about summoning spirits or bending time (though wouldn't that be cool?). It's about taking a simple piece of wood and transforming it into a captivating little box that holds the power of surprise and wonder. It's all about creating a sense of mystery and excitement with just a bit of crafting magic.

    What You'll Need

    Let's start with the essentials for our magic box. Don't worry, it's a pretty basic list, and you probably have most of these things lying around the house already:

    • A piece of plywood or a sturdy board (think something around 12" x 12").
    • A ruler or tape measure
    • A pencil
    • A saw (handsaw, jigsaw, or circular saw will work)
    • A drill
    • Screws or nails
    • Sandpaper (fine grit)
    • Optional: Wood glue, paint, decorative elements like buttons, beads, or fabric scraps.

    See, I told you it wasn't complicated. You can even get creative and substitute some of these items with things you might have on hand, like a cutting mat instead of plywood.

    The Construction Process: Let's Get Building!

    Now, the fun part! It's time to make your magic box come to life. Don't worry if you're a newbie to woodworking, this is a super beginner-friendly project:

    Step 1: Planning Your Box

    First things first, decide what kind of box you want. Will it be a simple cube, a rectangular box, or something more unique? Maybe even a box with a secret compartment? The possibilities are endless! Sketch your design on a piece of paper to get a visual idea.

    Once you have a design in mind, measure and mark your wood for cutting. Remember to account for the thickness of your wood when making your measurements, especially if you plan to have flaps or lids. You'll need to cut out four sides for your box and possibly a base and a lid.

    Step 2: Cutting the Pieces

    Now comes the exciting part - cutting! Make sure you have a safe and steady work surface. If you're using a handsaw, use a sawhorse to support your wood. If you're using a jigsaw or circular saw, make sure you have the correct blades and safety equipment like goggles and hearing protection.

    Carefully cut out your box sides, base, and lid (if you're making one) following your marked lines. You can use a pencil to make fine adjustments if needed. Take your time and work slowly to avoid mistakes.

    Step 3: Sanding for Smoothness

    Time to make those rough edges disappear! Sand the edges of all your box pieces with sandpaper, starting with a coarser grit and finishing with a fine grit for a smooth, polished finish. This is super important for safety and also gives your box a more professional look.

    Step 4: Assembly Time!

    Now that your pieces are prepped, let's put them together! Start by drilling pilot holes into the corners of your box sides to avoid splitting the wood when you screw or nail them together. You can use wood glue for extra strength, though it's not strictly necessary. If you're going for a super secure fit, use a slightly smaller screw size than the pilot hole you've drilled.

    Assemble your box carefully, making sure the corners are aligned. Don't worry if it looks a bit uneven at first, you can always adjust the pieces later. Let the glue dry completely if you used it before moving on.

    Step 5: Adding the Lid (Optional)

    If you decided to create a lid for your box, attach it using hinges or magnets. For a more professional look, you can use small hinges from your local hardware store. For a simple and quick option, you can attach the lid using magnets รข€" just drill holes and insert the magnets into the lid and the box, making sure they line up.

    Step 6: Decorations and Personalization

    The fun part! Now is the time to make your box truly magical. You can add anything you can imagine - paint it a fun color, add glitter, attach buttons, or even decoupage with fabric scraps. Let your imagination run wild!

    If you want to give your magic box a secret compartment, you can build a small box inside the larger box or hide a hidden space within the box's walls. Get creative with the design and make it unique to your own style.

    Magic Box Ideas: Let's Make It Special

    Alright, now that you have a basic understanding of how to build your box, let's get inspired and make it truly magical. Here are some ideas:

    • The Mystery Box: This is your classic, simple magic box. Decorate it with a mysterious design and use it to perform basic tricks like disappearing coins or revealing hidden objects.
    • The Illusion Box: This box can be used to create optical illusions, maybe with a moving image or a mirror effect. Get creative with your design and explore the world of visual trickery!
    • The Treasure Chest: This box can hold "treasures" - small toys, tokens, or trinkets - and reveal them to your audience with a flourish. You can add a lock and key for an extra touch of mystery.
    • The Secret Message Box: This box can hide secret messages, riddles, or clues for your audience to discover. Use a hidden compartment to store the message, and you can even add a hidden trigger to reveal it.
    • The Wishing Box: This box can be used to hold wishes, dreams, or goals written on slips of paper. You can add a slot in the lid to drop in the wishes, making it a fun and interactive way to share hopes and dreams.

    These are just a few ideas to get you started. The possibilities are endless! The most important thing is to have fun and be creative with your design. Don't be afraid to experiment and see what you can come up with.

    Final Touches and Performance Time!

    Once your box is built and decorated, it's time to think about the performance. How will you reveal the magic? Will you use a simple flourish, a dramatic reveal, or something more elaborate? You can even learn some basic magic tricks to incorporate into your show.

    The best part about DIY magic boxes is that they allow you to customize the experience to match your personality and style. Let your imagination be your guide and enjoy the process of creating your own unique magic box!

    So, what are you waiting for? Grab your tools, gather your materials, and let's create some magic together! Happy crafting!

    Share:

    Building a Compact Bedside Cabinet: Free PDF Guide for DIY Enthusiasts

    Building a Compact Bedside Cabinet: Free PDF Guide for DIY Enthusiasts

    Building a Compact Bedside Cabinet: A Comprehensive DIY Guide

    Elevate your bedroom's style and functionality with a custom-built bedside cabinet. This guide provides step-by-step instructions and detailed plans to construct a compact and elegant cabinet that perfectly complements your existing decor.

    Materials and Tools

    Materials

    • Wood: Choose a durable and aesthetically pleasing wood like pine, oak, or maple. Consider using pre-cut lumber for ease of construction.
    • Wood glue
    • Wood screws (various sizes)
    • Sandpaper (various grits)
    • Wood stain (optional)
    • Polyurethane finish (optional)
    • Drawer slides
    • Drawer front (for the drawer face)
    • Drawer knobs or handles
    • Cabinet hinges
    • Cabinet door (optional)
    • Door hinges (optional)
    • Door knob or handle (optional)

    Tools

    • Measuring tape
    • Pencil
    • Saw (circular saw, jigsaw, or hand saw)
    • Drill
    • Screwdriver
    • Clamps
    • Level
    • Sanding block or sander
    • Paint brush (for stain or finish)
    • Safety glasses and gloves

    Project Plans

    Before beginning construction, carefully review the following plans and make any adjustments based on your desired dimensions and design preferences.

    Cabinet Dimensions (Example)

    • Height: 24 inches
    • Width: 16 inches
    • Depth: 12 inches
    • Drawer height: 6 inches
    • Drawer width: 14 inches
    • Drawer depth: 10 inches

    Cut List

    • Sides (2 pieces): 24 inches x 12 inches
    • Top: 16 inches x 12 inches
    • Bottom: 16 inches x 12 inches
    • Back panel: 16 inches x 22 inches
    • Shelf (optional): 14 inches x 10 inches
    • Drawer sides (2 pieces): 6 inches x 10 inches
    • Drawer front: 14 inches x 6 inches
    • Drawer back: 10 inches x 6 inches
    • Drawer bottom: 14 inches x 10 inches

    Construction Process

    Step 1: Cut the Wood

    Carefully cut the wood pieces according to the dimensions in the cut list. Use a saw that is appropriate for the type of wood you're using. Ensure all cuts are precise and clean.

    Step 2: Assemble the Cabinet Sides

    Attach the sides to the bottom panel using wood glue and screws. Use clamps to hold the pieces together while the glue dries. Apply glue to the inside edges of the sides and bottom panel, ensuring a strong bond. Drill pilot holes before driving screws to prevent splitting the wood. Position the screws approximately 1 inch from the edge of each piece.

    Step 3: Attach the Back Panel

    After the sides and bottom are secure, attach the back panel using glue and screws. Position the back panel flush with the top edge of the sides. Apply glue to the edges of the back panel and secure it with screws. Ensure the screws are countersunk and that the back panel is flush with the sides.

    Step 4: Attach the Top

    Attach the top to the assembled sides using wood glue and screws. Apply glue to the edges of the top and sides, aligning the top with the sides. Secure the top using screws, ensuring that they are countersunk and that the top is flush with the sides.

    Step 5: Add Optional Shelf

    (Optional) If you're including a shelf, position and secure it within the cabinet using glue and screws. Choose a height for the shelf that complements your storage needs.

    Step 6: Build the Drawer

    Construct the drawer using the drawer sides, front, back, and bottom pieces. Follow the same technique used to assemble the cabinet sides, using glue and screws to secure each piece. Position the drawer sides against the drawer bottom and front. Attach the drawer back using glue and screws, ensuring it is flush with the drawer sides.

    Step 7: Install Drawer Slides

    Attach the drawer slides to the sides of the cabinet, ensuring they are positioned correctly for smooth drawer operation. Choose drawer slides that are compatible with the dimensions of your drawer.

    Step 8: Attach the Drawer Front

    Once the slides are installed, attach the drawer front to the drawer. Use wood glue and screws to create a secure connection. Ensure the drawer front is flush with the drawer sides.

    Step 9: Install Drawer Knobs or Handles

    Attach the drawer knobs or handles to the drawer front. Position them symmetrically and drill pilot holes before screwing them into place.

    Step 10: Finish the Cabinet (Optional)

    If desired, apply a stain or finish to the cabinet to enhance its appearance and provide protection. Sand the cabinet with various grits of sandpaper to create a smooth surface before applying the finish. Allow the finish to dry completely according to the manufacturer's instructions.

    Step 11: Install Cabinet Door (Optional)

    (Optional) If you're including a cabinet door, attach the hinges to the door and the cabinet. Ensure the hinges are aligned correctly and that the door swings freely. Install a door knob or handle to complete the door.

    Tips for Success

    • Plan and Measure Carefully: Before making any cuts, carefully review the plans and measure all pieces twice to ensure accuracy. This will minimize waste and prevent mistakes.
    • Use Quality Materials: Invest in durable and aesthetically pleasing wood to create a long-lasting and attractive cabinet. Consider using pre-cut lumber for ease of construction.
    • Pre-drill Pilot Holes: Before driving screws, pre-drill pilot holes to prevent splitting the wood. This is especially important for softer woods like pine.
    • Use Clamps: Use clamps to hold pieces together while the glue dries, ensuring a strong bond.
    • Sand Smoothly: Sand all surfaces smooth after assembly to create a polished look and eliminate any sharp edges.
    • Finish with Care: If you're applying a stain or finish, choose a product that complements your style and provides adequate protection for your cabinet.

    Conclusion

    Building a compact bedside cabinet is a rewarding DIY project that enhances your bedroom's style and functionality. By following these detailed plans and tips, you can create a custom-built cabinet that perfectly meets your needs and reflects your personal taste.

    Remember, patience and precision are key to achieving a professional result. With careful planning and execution, you can create a stunning and functional bedside cabinet that you'll enjoy for years to come.

    Share:

    Floating vs. Floor Bedside Cabinets: Which Should You Build?

    Floating vs. Floor Bedside Cabinets: Which Should You Build?

    Choosing the perfect bedside cabinet can transform your bedroom from drab to fab. But with so many styles and options available, it can be overwhelming to decide what's best for your space. Two popular choices are floating and floor bedside cabinets, each with their own advantages and disadvantages.

    Let's dive into the pros and cons of both to help you choose the perfect bedside companion for your dreams.

    Floating Bedside Cabinets: A Sleek and Modern Option

    Floating bedside cabinets are a popular choice for modern bedrooms. They are known for their sleek, minimalist aesthetic and can create a sense of spaciousness. The absence of legs makes the space appear larger, which is especially beneficial for smaller bedrooms. Floating bedside cabinets are also easy to clean, as there are no legs or crevices to gather dust.

    Pros of Floating Bedside Cabinets

    • Sleek and modern design: They create a contemporary feel and enhance the overall aesthetics of your bedroom.
    • Space-saving: The absence of legs allows for more floor space and creates an illusion of a larger room.
    • Easy to clean: No legs or crevices mean less dust accumulation and easier cleaning.
    • Versatile: They can be installed at different heights to suit your needs and preferences.

    Cons of Floating Bedside Cabinets

    • Installation complexity: They require professional installation and may not be suitable for all wall types.
    • Limited storage: Floating cabinets are typically smaller in size compared to floor cabinets, offering less storage space.
    • Cost: Installation and materials can be more expensive than floor cabinets.

    Floor Bedside Cabinets: A Traditional and Sturdy Option

    Floor bedside cabinets are the traditional choice for bedrooms. They offer a classic and timeless look and are typically more sturdy and durable than floating cabinets. They are also known for their versatility in style, size, and materials, allowing you to find the perfect match for your bedroom's decor.

    Pros of Floor Bedside Cabinets

    • Sturdy and durable: They are built to last and can withstand wear and tear over time.
    • Versatility: Wide range of styles, sizes, and materials to choose from, allowing for easy customization.
    • Greater storage capacity: They typically offer more storage space than floating cabinets.
    • Easy installation: No special installation is required, making them easy to set up.

    Cons of Floor Bedside Cabinets

    • Can appear bulky: Floor cabinets can take up more visual space than floating cabinets.
    • Can be difficult to clean under: The legs and base can trap dust and debris, making cleaning more difficult.

    Choosing the Right Bedside Cabinet for You

    The best choice for you depends on your individual needs and preferences. Consider the following factors when deciding between floating and floor bedside cabinets:

    • Space: Do you have a small or large bedroom? Floating cabinets are ideal for small bedrooms, while floor cabinets offer more storage space for larger bedrooms.
    • Style: Do you prefer a sleek and modern aesthetic or a classic and timeless look? Floating cabinets are ideal for modern decor, while floor cabinets are suitable for any style.
    • Budget: Floor cabinets are typically more affordable than floating cabinets, which can be expensive to install.
    • Wall type: Floating cabinets require specific wall types for installation. If your walls are not suitable, floor cabinets might be a better option.

    Ultimately, the best bedside cabinet is the one that meets your needs and complements your bedroom style. Consider your personal preferences and explore different options before making your final decision.

    Share:

    Step-by-step diy wooden clock building tutorial

    Step-by-step diy wooden clock building tutorial

    Constructing a Wooden Clock: A Comprehensive Guide

    Crafting a wooden clock is a rewarding project that blends artistry with functionality. This guide provides a comprehensive walkthrough, leading you from concept to completion. By following these detailed instructions, you can create a unique and personalized timepiece that will adorn your home for years to come.

    Materials and Tools

    Before embarking on your clock-building journey, gather the necessary materials and tools. This list ensures you have everything at hand for a smooth construction process.

    Materials:

    • Wood: Choose a wood type that complements your design aesthetic. Popular options include walnut, cherry, oak, or maple. Consider the thickness required for stability and desired visual impact.
    • Clock Movement: Select a clock movement compatible with your design. Quartz movements are readily available and offer reliable timekeeping.
    • Clock Hands: Choose hands that harmonize with your clock design. Consider length, material, and style.
    • Clock Face Template: Download or create a clock face template to guide your design and ensure accurate placement of numbers or markings.
    • Wood Glue: Opt for a high-quality wood glue designed for strong bonds.
    • Wood Finish: Select a finish that enhances the wood's natural beauty. Options include oil, varnish, or stain.
    • Clock Numbers or Markings: Choose your preferred method for indicating time: Roman numerals, Arabic numerals, or decorative markings.
    • Hardware: This may include screws, nuts, washers, and a mounting bracket, depending on your design.

    Tools:

    • Saw: A jigsaw or table saw will allow you to precisely cut the wood to your desired shape.
    • Sandpaper: Sandpaper in various grits (from coarse to fine) is essential for smoothing the wood and creating a polished surface.
    • Drill: A drill with various drill bits is crucial for creating holes for the clock movement, hands, and mounting hardware.
    • Clamps: Clamps are useful for holding pieces together during gluing or assembly.
    • Measuring Tape and Ruler: Accuracy is vital in clockmaking. Use a measuring tape and ruler to ensure precise dimensions.
    • Pencil or Pen: Marking your wood is essential for cutting, drilling, and design.
    • Hammer: A hammer may be needed for driving nails or securing hardware.
    • Screwdriver: A screwdriver is essential for installing the clock movement, hands, and any other hardware.
    • Safety Glasses and Dust Mask: Always wear safety glasses and a dust mask when working with wood and tools.

    Designing Your Clock

    The design stage is where your creativity comes to life. Consider these aspects when developing your clock concept:

    Shape and Size:

    • Round: Traditional and classic, offering a timeless aesthetic.
    • Square or Rectangle: Provides a modern and minimalist feel.
    • Custom Shapes: Explore intricate designs, incorporating curves, angles, or unique features.

    Material Choice:

    • Wood Type: Each wood has unique characteristics, influencing color, grain patterns, and durability.
    • Finish: The finish enhances the wood's beauty and provides protection. Consider oil, varnish, or stain for different effects.

    Clock Face Design:

    • Numbers or Markings: Roman numerals, Arabic numerals, or decorative markings add visual interest and enhance readability.
    • Color Scheme: Select colors that complement the wood and overall design.

    Construction Steps

    Once your design is finalized, it's time to bring your clock to life. Follow these step-by-step instructions:

    1. Cutting the Wood

    • Use a jigsaw or table saw to cut the wood to your desired dimensions based on your design.
    • Ensure precise cuts using a measuring tape and ruler for accurate dimensions.
    • Sand the cut edges smooth with sandpaper to eliminate rough areas and prepare for assembly.

    2. Assembling the Clock Base

    • Apply wood glue to the edges of the wood pieces that will form the base of your clock.
    • Clamp the pieces together, ensuring they are aligned and secure.
    • Allow the glue to dry completely according to the manufacturer's instructions.

    3. Creating the Clock Face

    • Use your clock face template to mark the location of the clock movement, hands, and numbers or markings on your clock face.
    • Use a drill to create holes for the clock movement and hands. The diameter of the holes should correspond to the size of the clock movement and hands.
    • Attach the numbers or markings to the clock face using glue or screws, ensuring they are centered and aligned.

    4. Installing the Clock Movement and Hands

    • Place the clock movement in its designated hole on the clock face, ensuring the hands are aligned with the movement's shaft.
    • Secure the clock movement to the clock face using screws, nuts, or washers, depending on the design of your clock movement.
    • Attach the clock hands to the clock movement's shaft, ensuring they are securely mounted.

    5. Finishing the Clock

    • Sand the entire clock surface with sandpaper to create a smooth and polished finish.
    • Apply your chosen wood finish to the clock, following the manufacturer's instructions for application and drying time.
    • Allow the finish to dry completely before proceeding to the next step.

    6. Mounting the Clock

    • If desired, attach a mounting bracket to the back of the clock for wall hanging.
    • Use screws or nails to secure the clock to the wall.
    • Ensure the clock is level and securely mounted.

    Tips for Success

    These additional tips can help you create a high-quality and stunning wooden clock:

    • Plan Ahead: Carefully plan your design before starting to ensure you have all the necessary materials and tools.
    • Accuracy is Key: Measure twice, cut once. Precision is paramount for a well-built clock.
    • Practice Makes Perfect: If you are new to woodworking, practice on scrap wood before working on your final piece.
    • Safety First: Always wear safety glasses and a dust mask when using power tools.
    • Let Glue Dry Thoroughly: Ensure wood glue dries completely before applying any finish.
    • Be Patient: Clockmaking requires patience and attention to detail. Enjoy the process and take your time to achieve a quality result.
    Share:

    Popular Posts

    Blog Archive

    Powered by Blogger.

    Recent Posts